Manage Bkper Subscription
How to subscribe, upgrade, downgrade, cancel, update payment, and access invoices for your Bkper subscription.
This guide covers the full lifecycle of a Bkper subscription billed through Stripe — subscribing, upgrading, downgrading, cancelling, updating your payment method, and accessing invoices. If you subscribe through the Google Cloud Marketplace, see Bkper on Google Cloud instead.
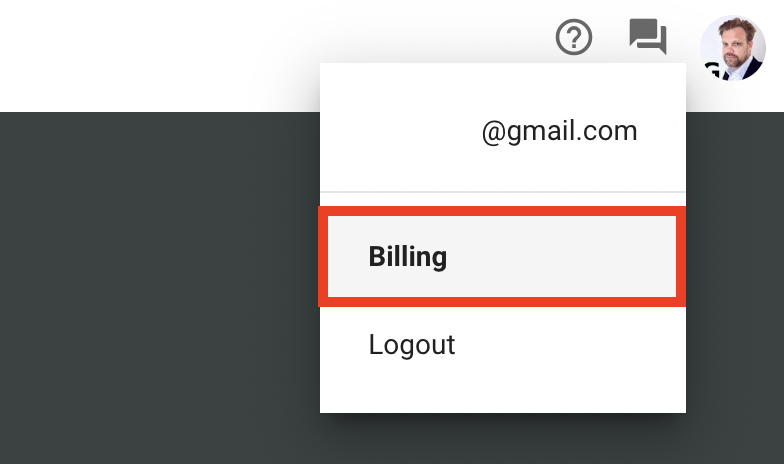
All subscription changes are managed from the Billing page. Sign in to Bkper and click on your avatar in the top-right corner, then select Billing.
Subscribing to a paid plan
Sign in to Bkper and click on your avatar in the top-right corner of the web app.

Select Pricing, then click Choose on the subscription plan you want. The checkout page opens with the subscription details and price on the left side.
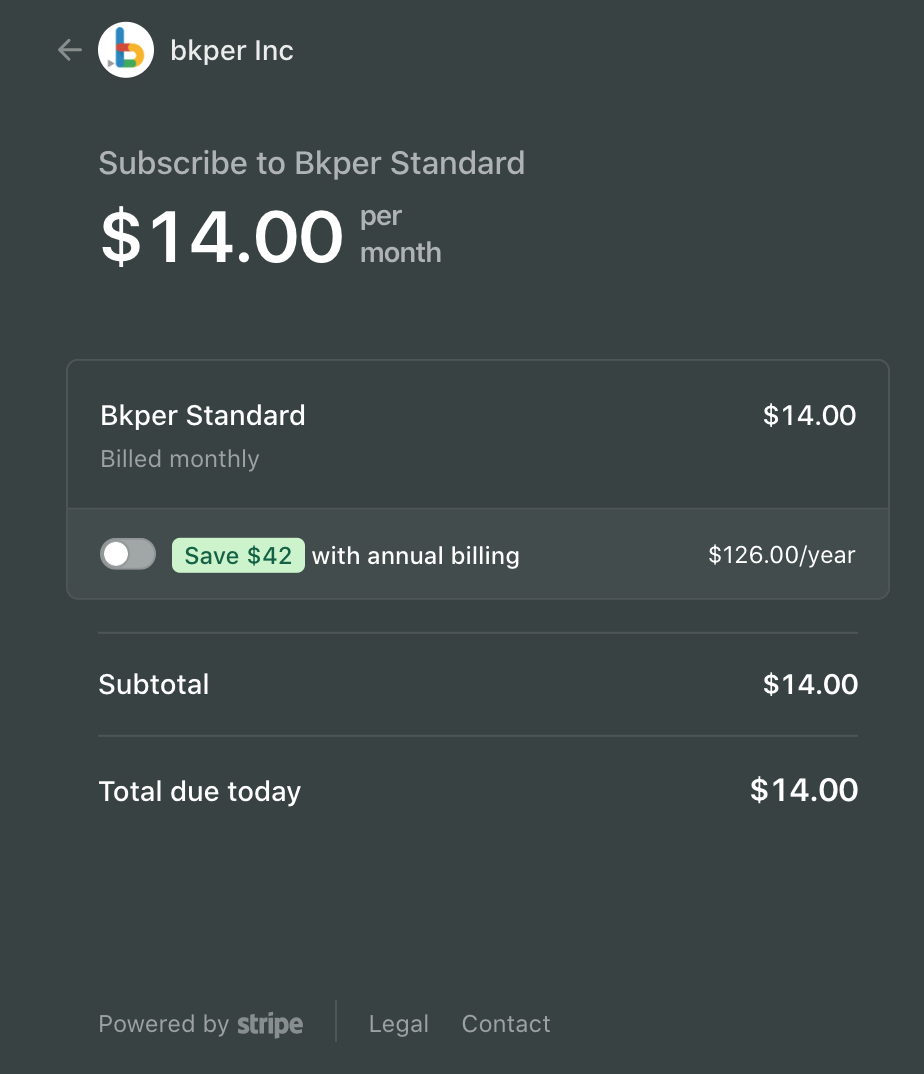
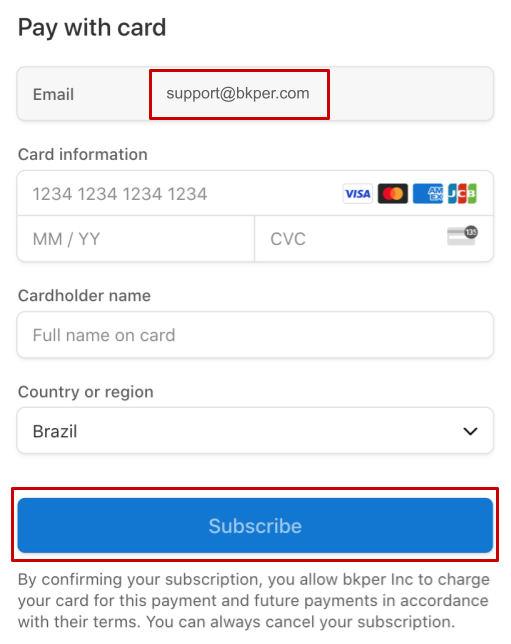
Make sure you are signed in with the correct book owner email account. Fill out your card details on the right side and press the Subscribe button.
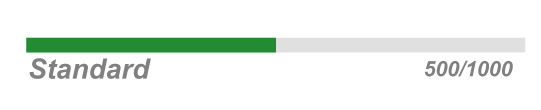
Your subscription is now active. The subscription details appear in the bottom-left corner of the books you own, and the Bkper Pricing page reflects your current plan.
Bkper charges monthly or annually on the same day of the month or year. Each successful charge triggers an email with an invoice and receipt for your records. Contact details are included in the email and on the invoice for any billing questions.
Bkper sends email reminders when a payment is overdue and when a card is about to expire. After three failed charge attempts, the subscription is automatically cancelled — but you can return and resubscribe at any time.
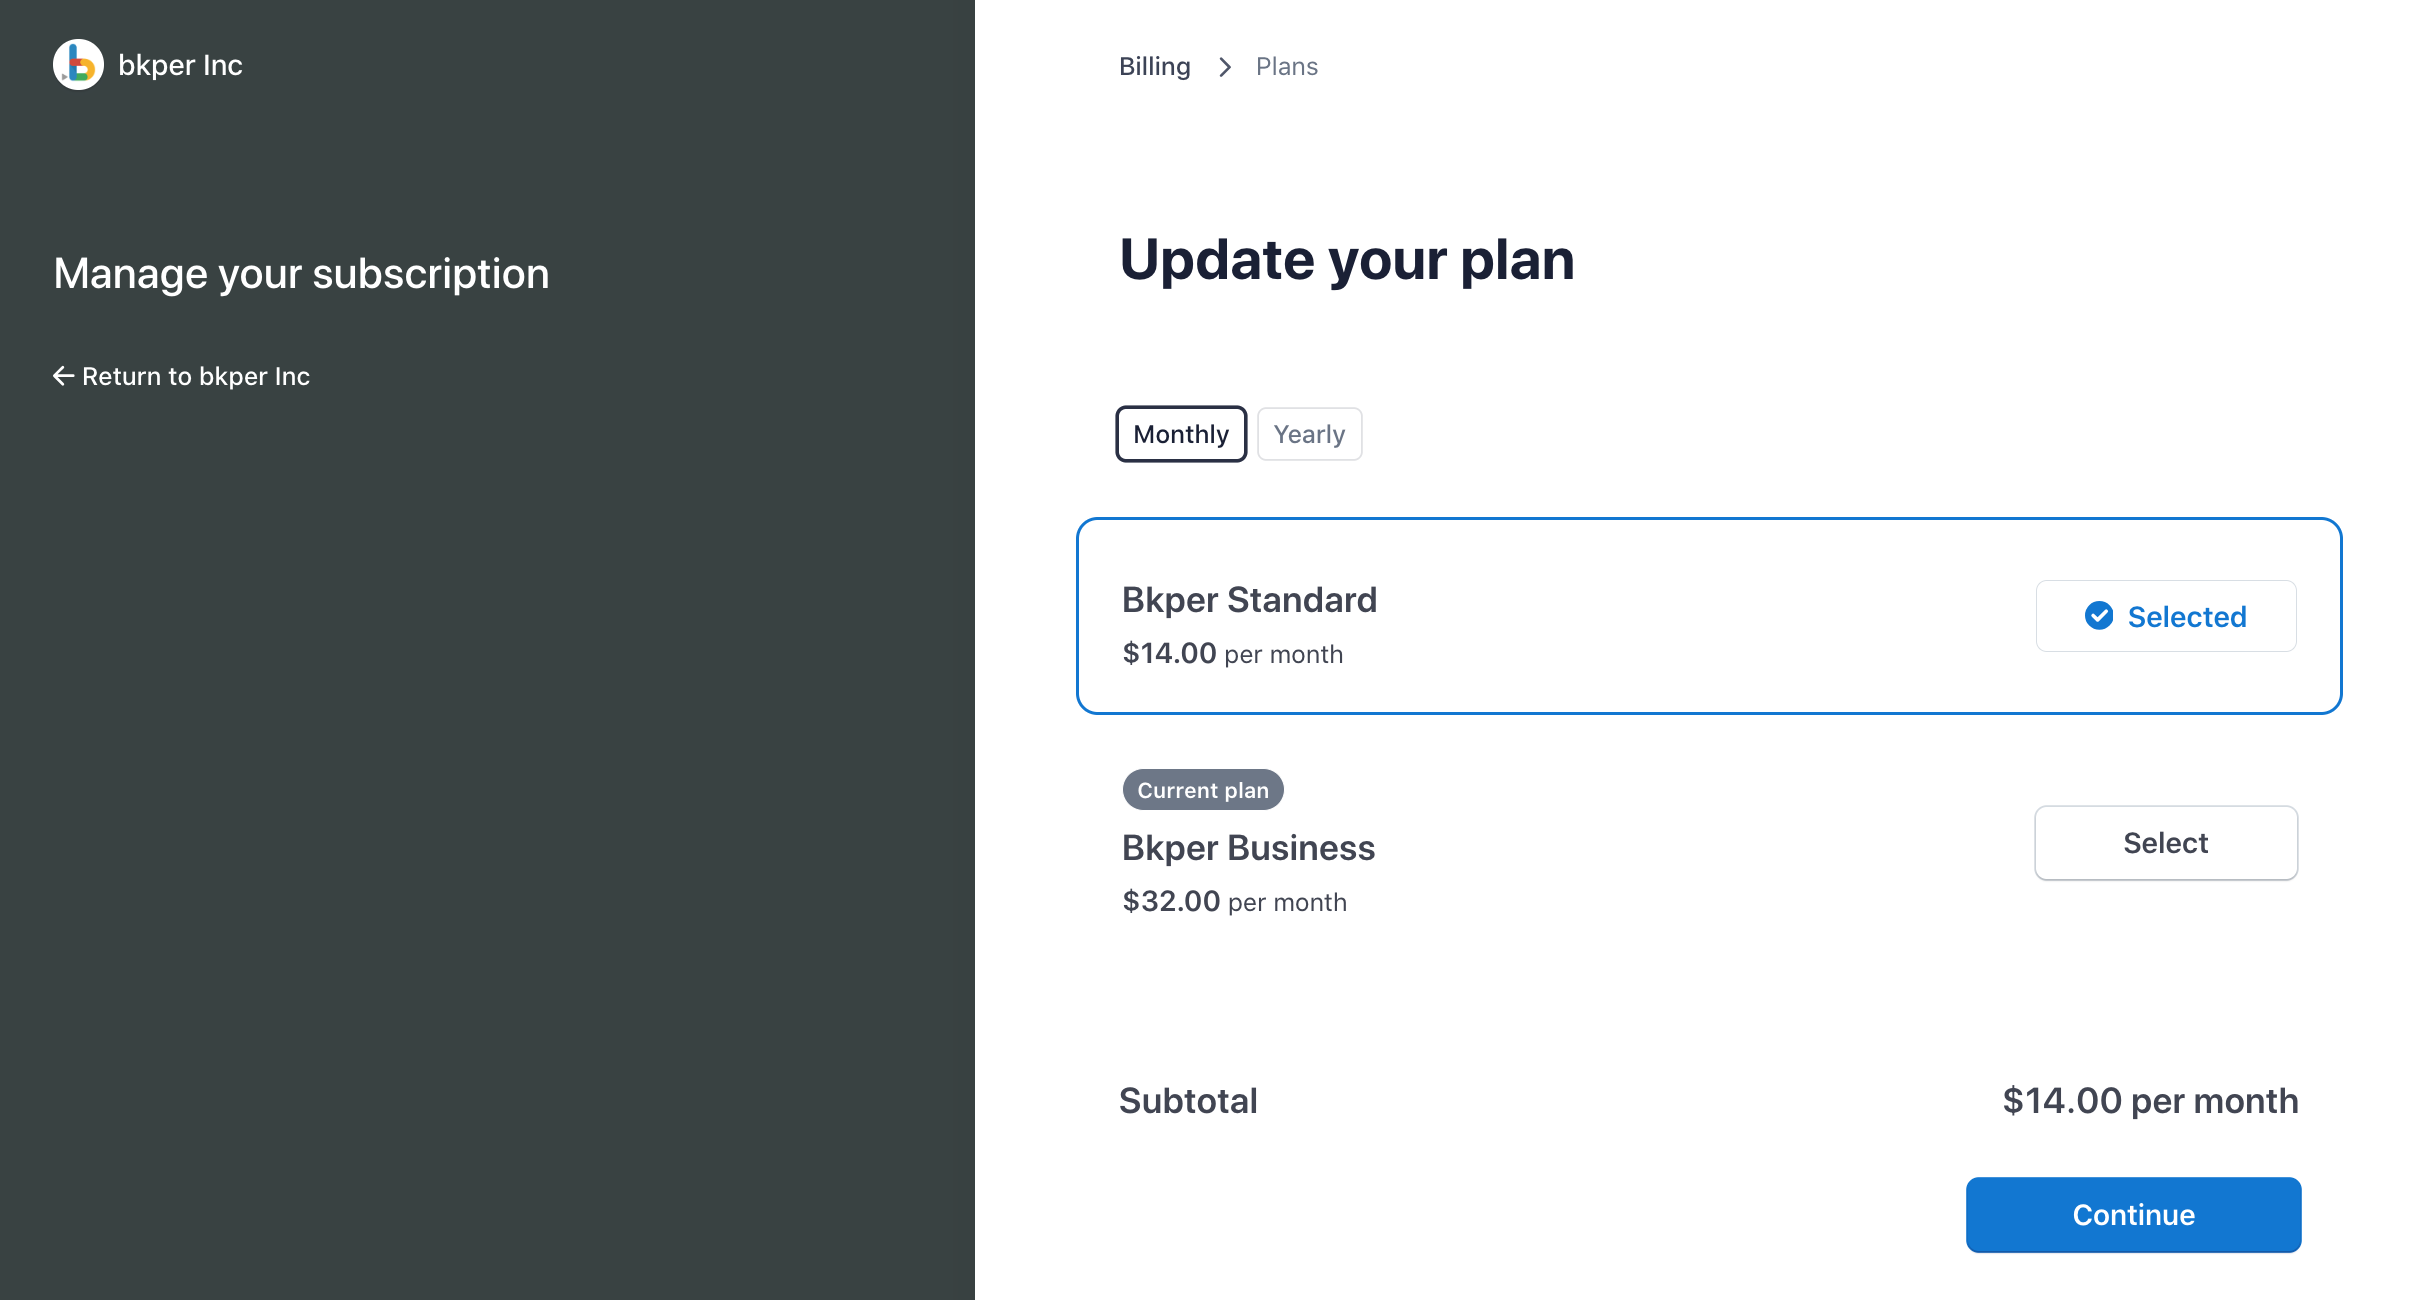
Upgrading your plan
When you reach the transaction threshold of your current plan and need to continue posting during the current month, you can upgrade your Bkper subscription to the next tier.
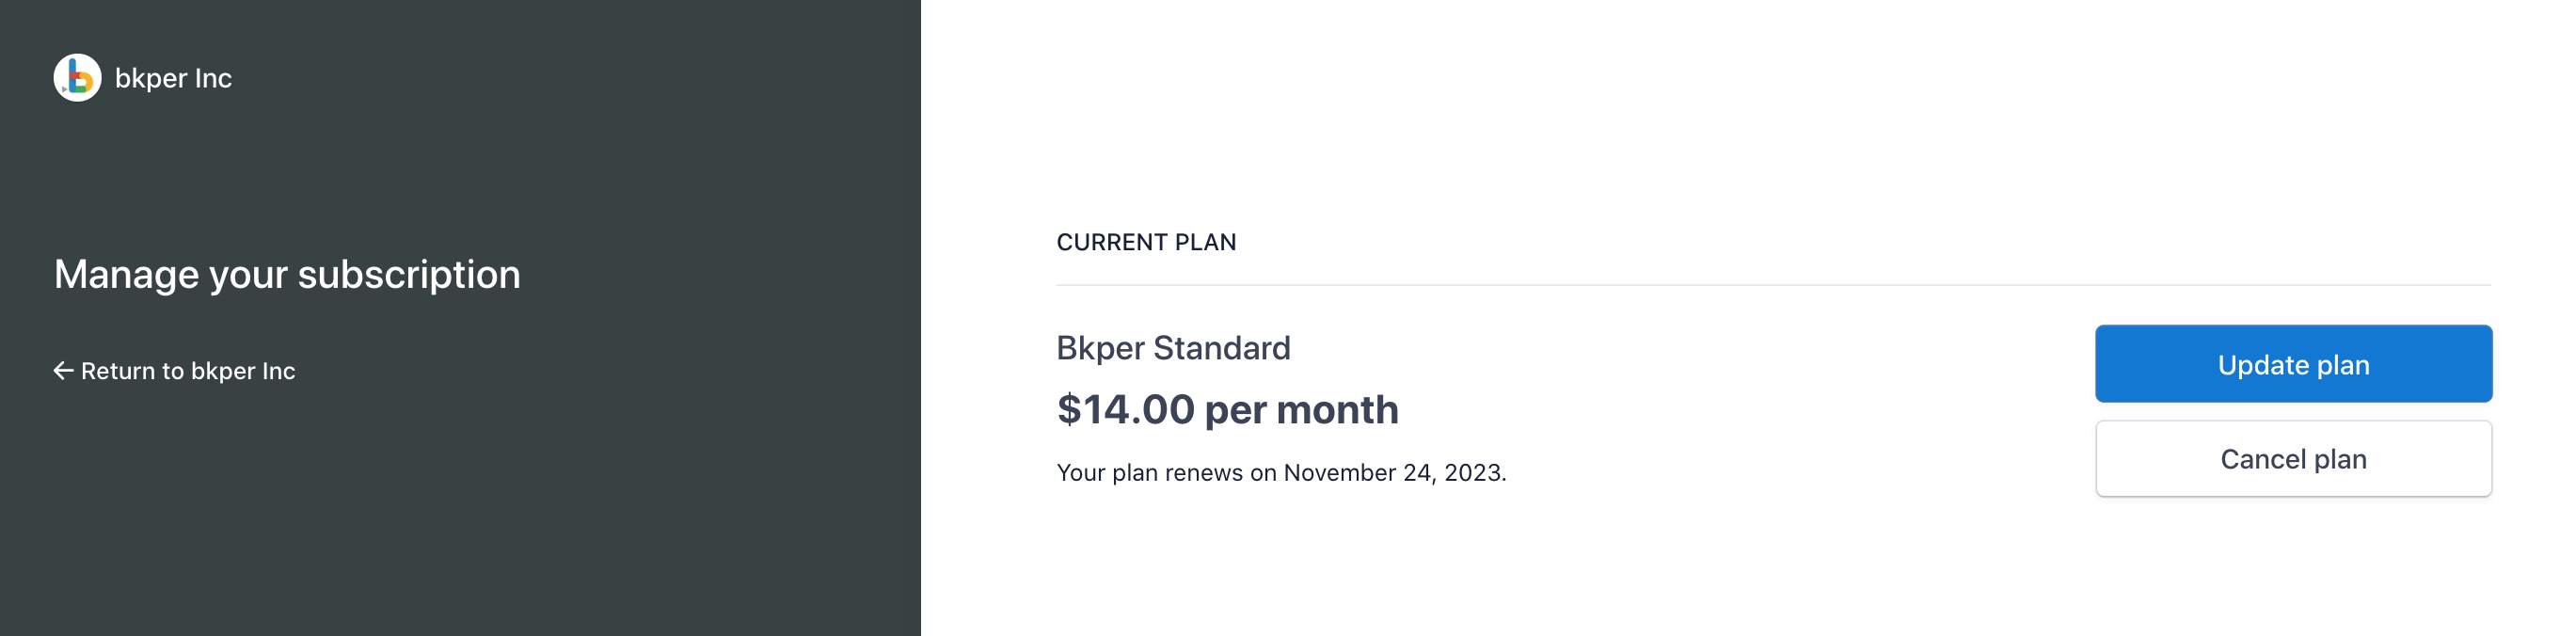
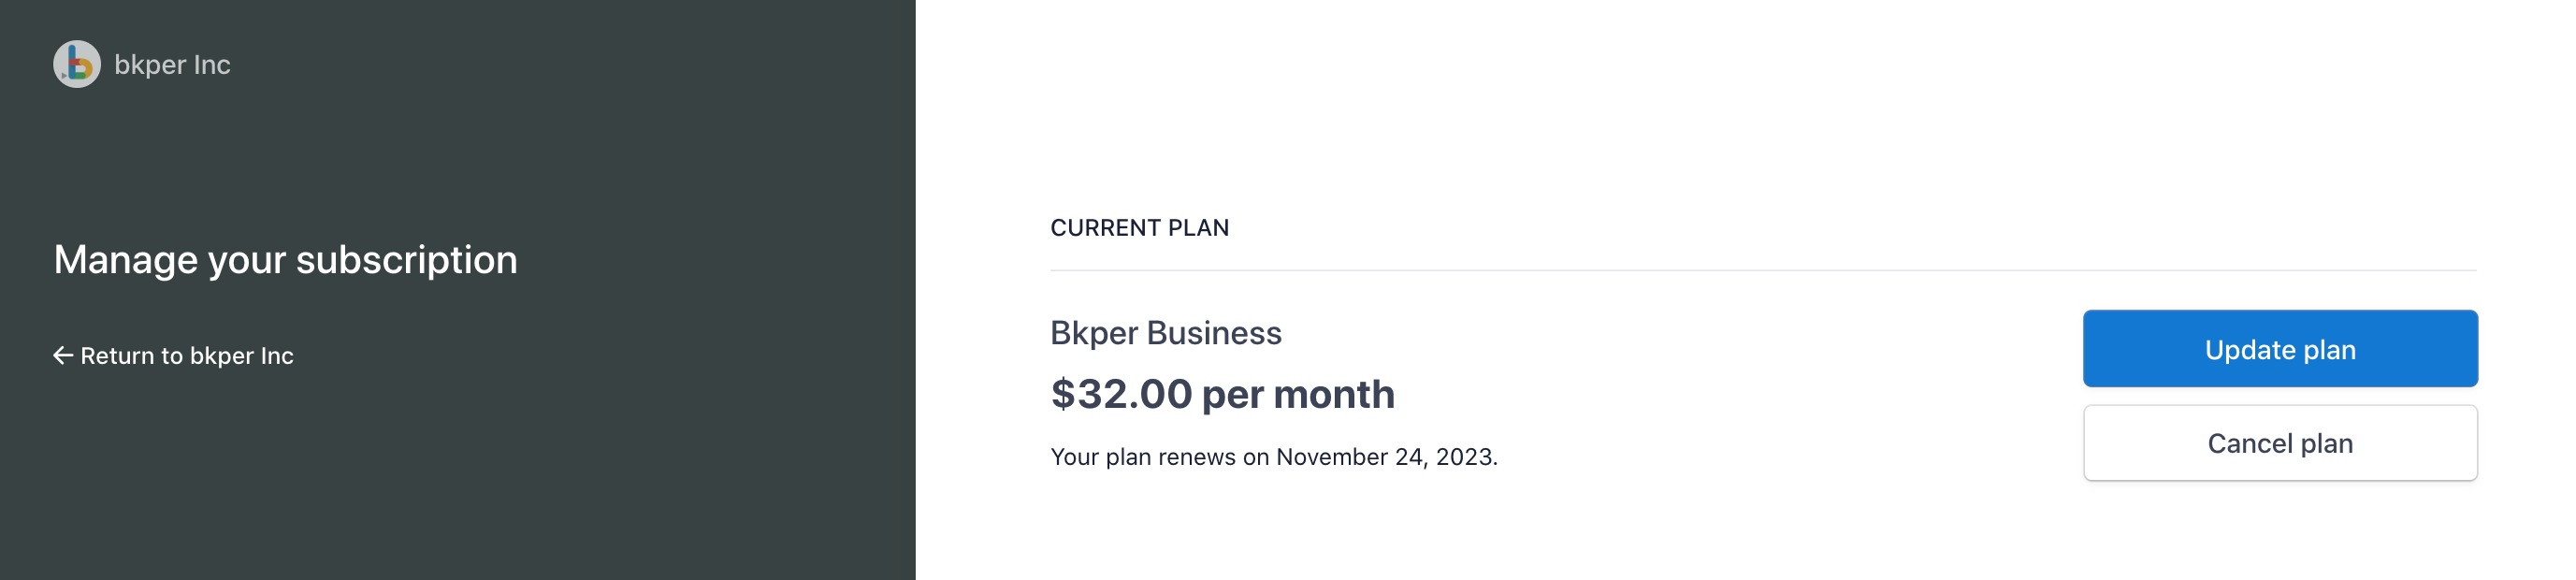
On the Billing page, press the Update plan button.
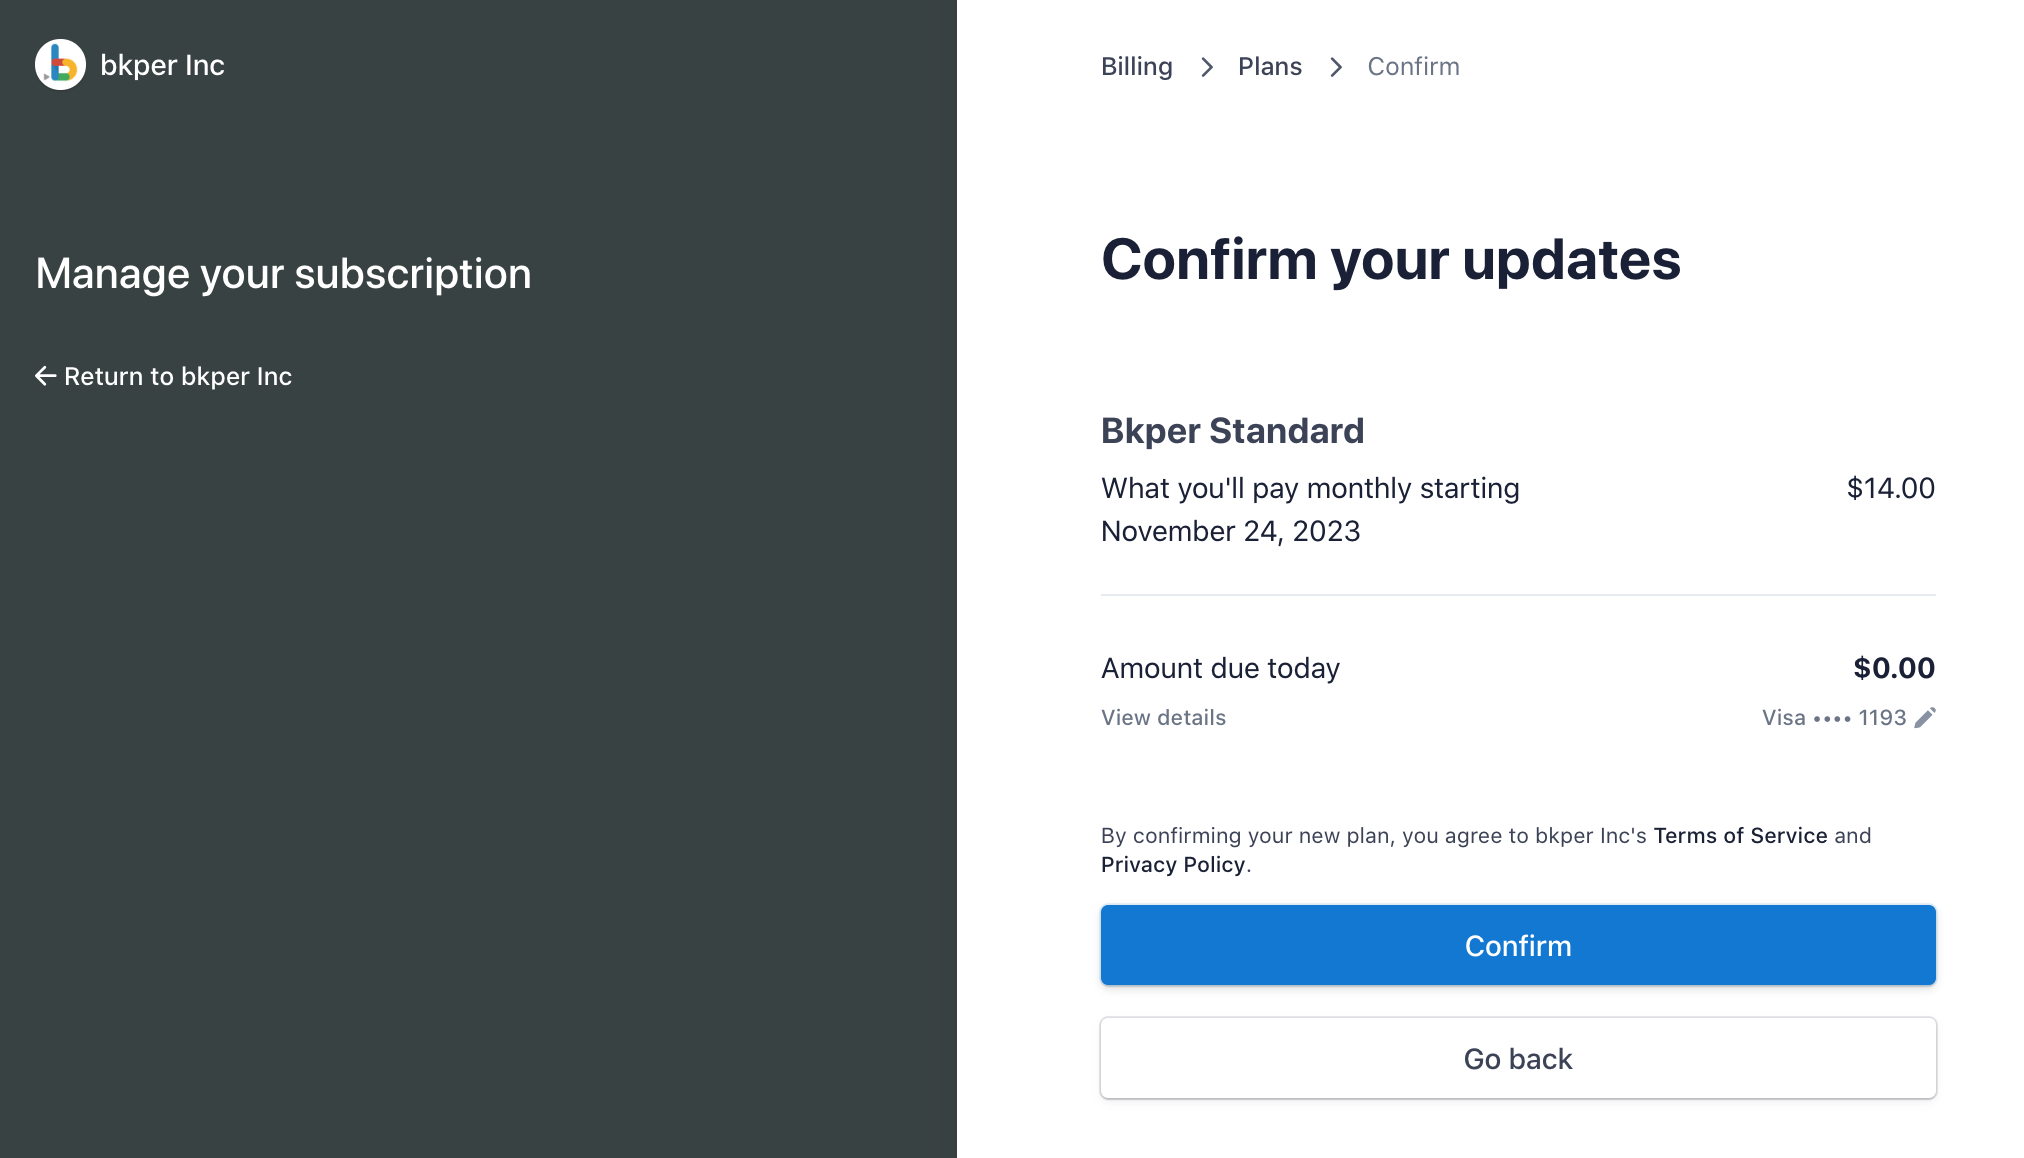
Select the plan you want to upgrade to and press Continue.
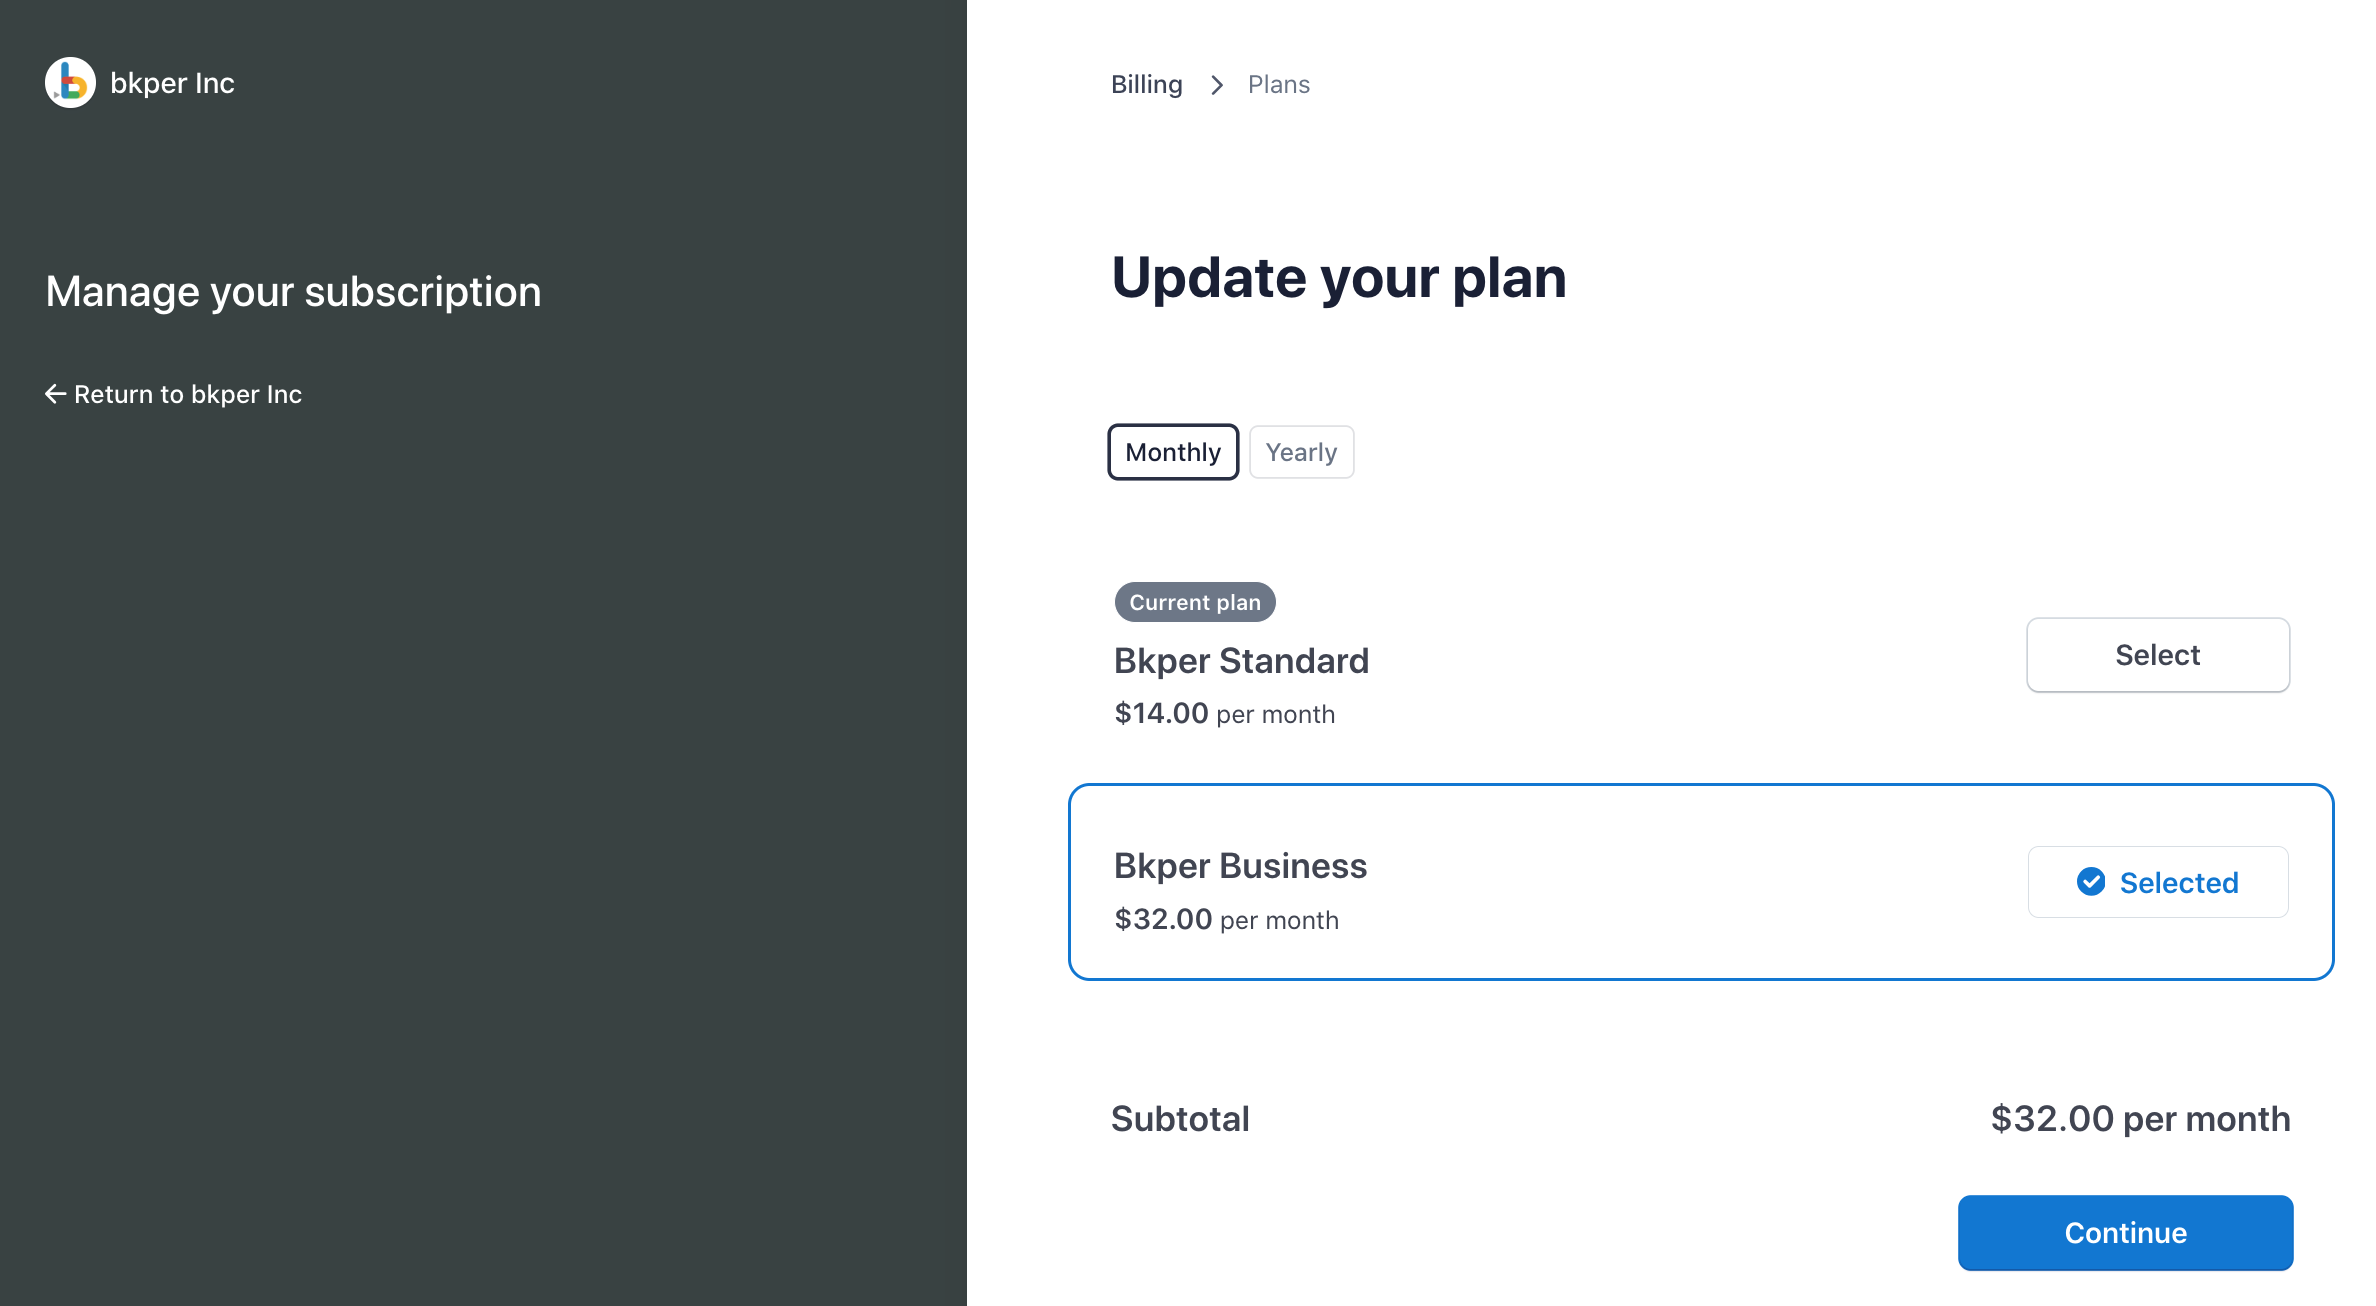
Confirm the update and press Confirm.
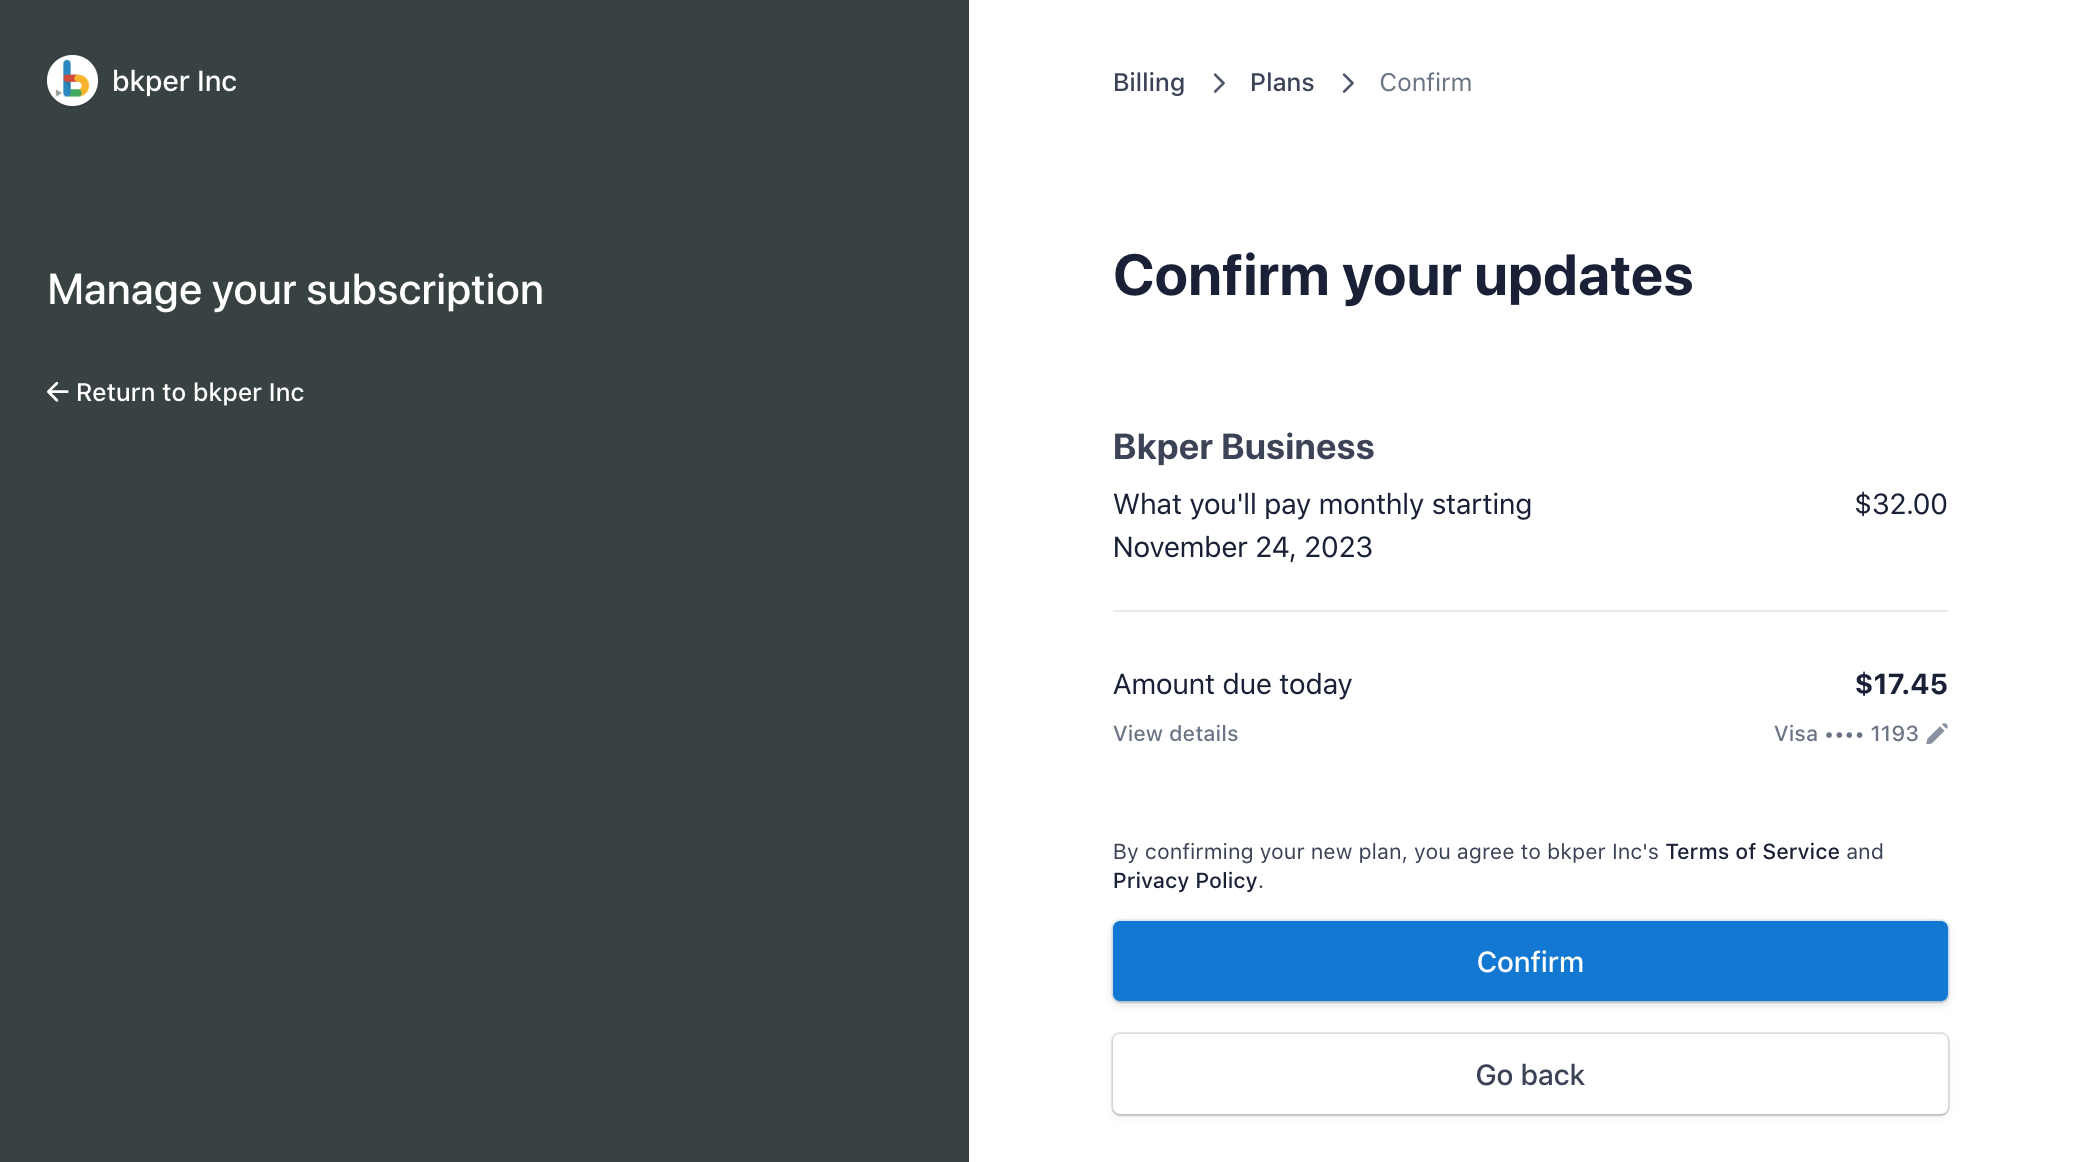
Your subscription plan is now updated.
If you’re upgrading from Bkper Free to a paid plan, follow the steps in Subscribing to a paid plan above.
Please contact the Bkper team to upgrade to the Bkper Professional tier.
Downgrading your plan
If you need fewer transactions than your current plan offers, you can downgrade to a lower tier.
Click on your avatar in the top-right corner.
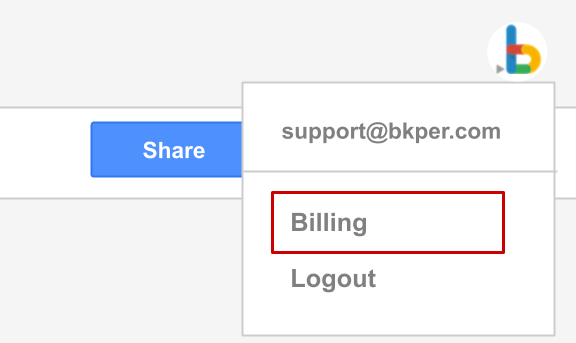
Select Billing. The Billing page opens. Press the Update plan button.
Select the plan you want to downgrade to and press Continue.
Confirm the update and press Confirm.
Your subscription plan is now downgraded.
To downgrade to the Bkper Free tier, see Cancelling your subscription below.
Cancelling your subscription
If you no longer need a paid plan, you can cancel your Bkper subscription at any time.
Open the Billing page by clicking on your avatar in the top-right corner and selecting Billing.
On the Billing page, press the Cancel plan button.
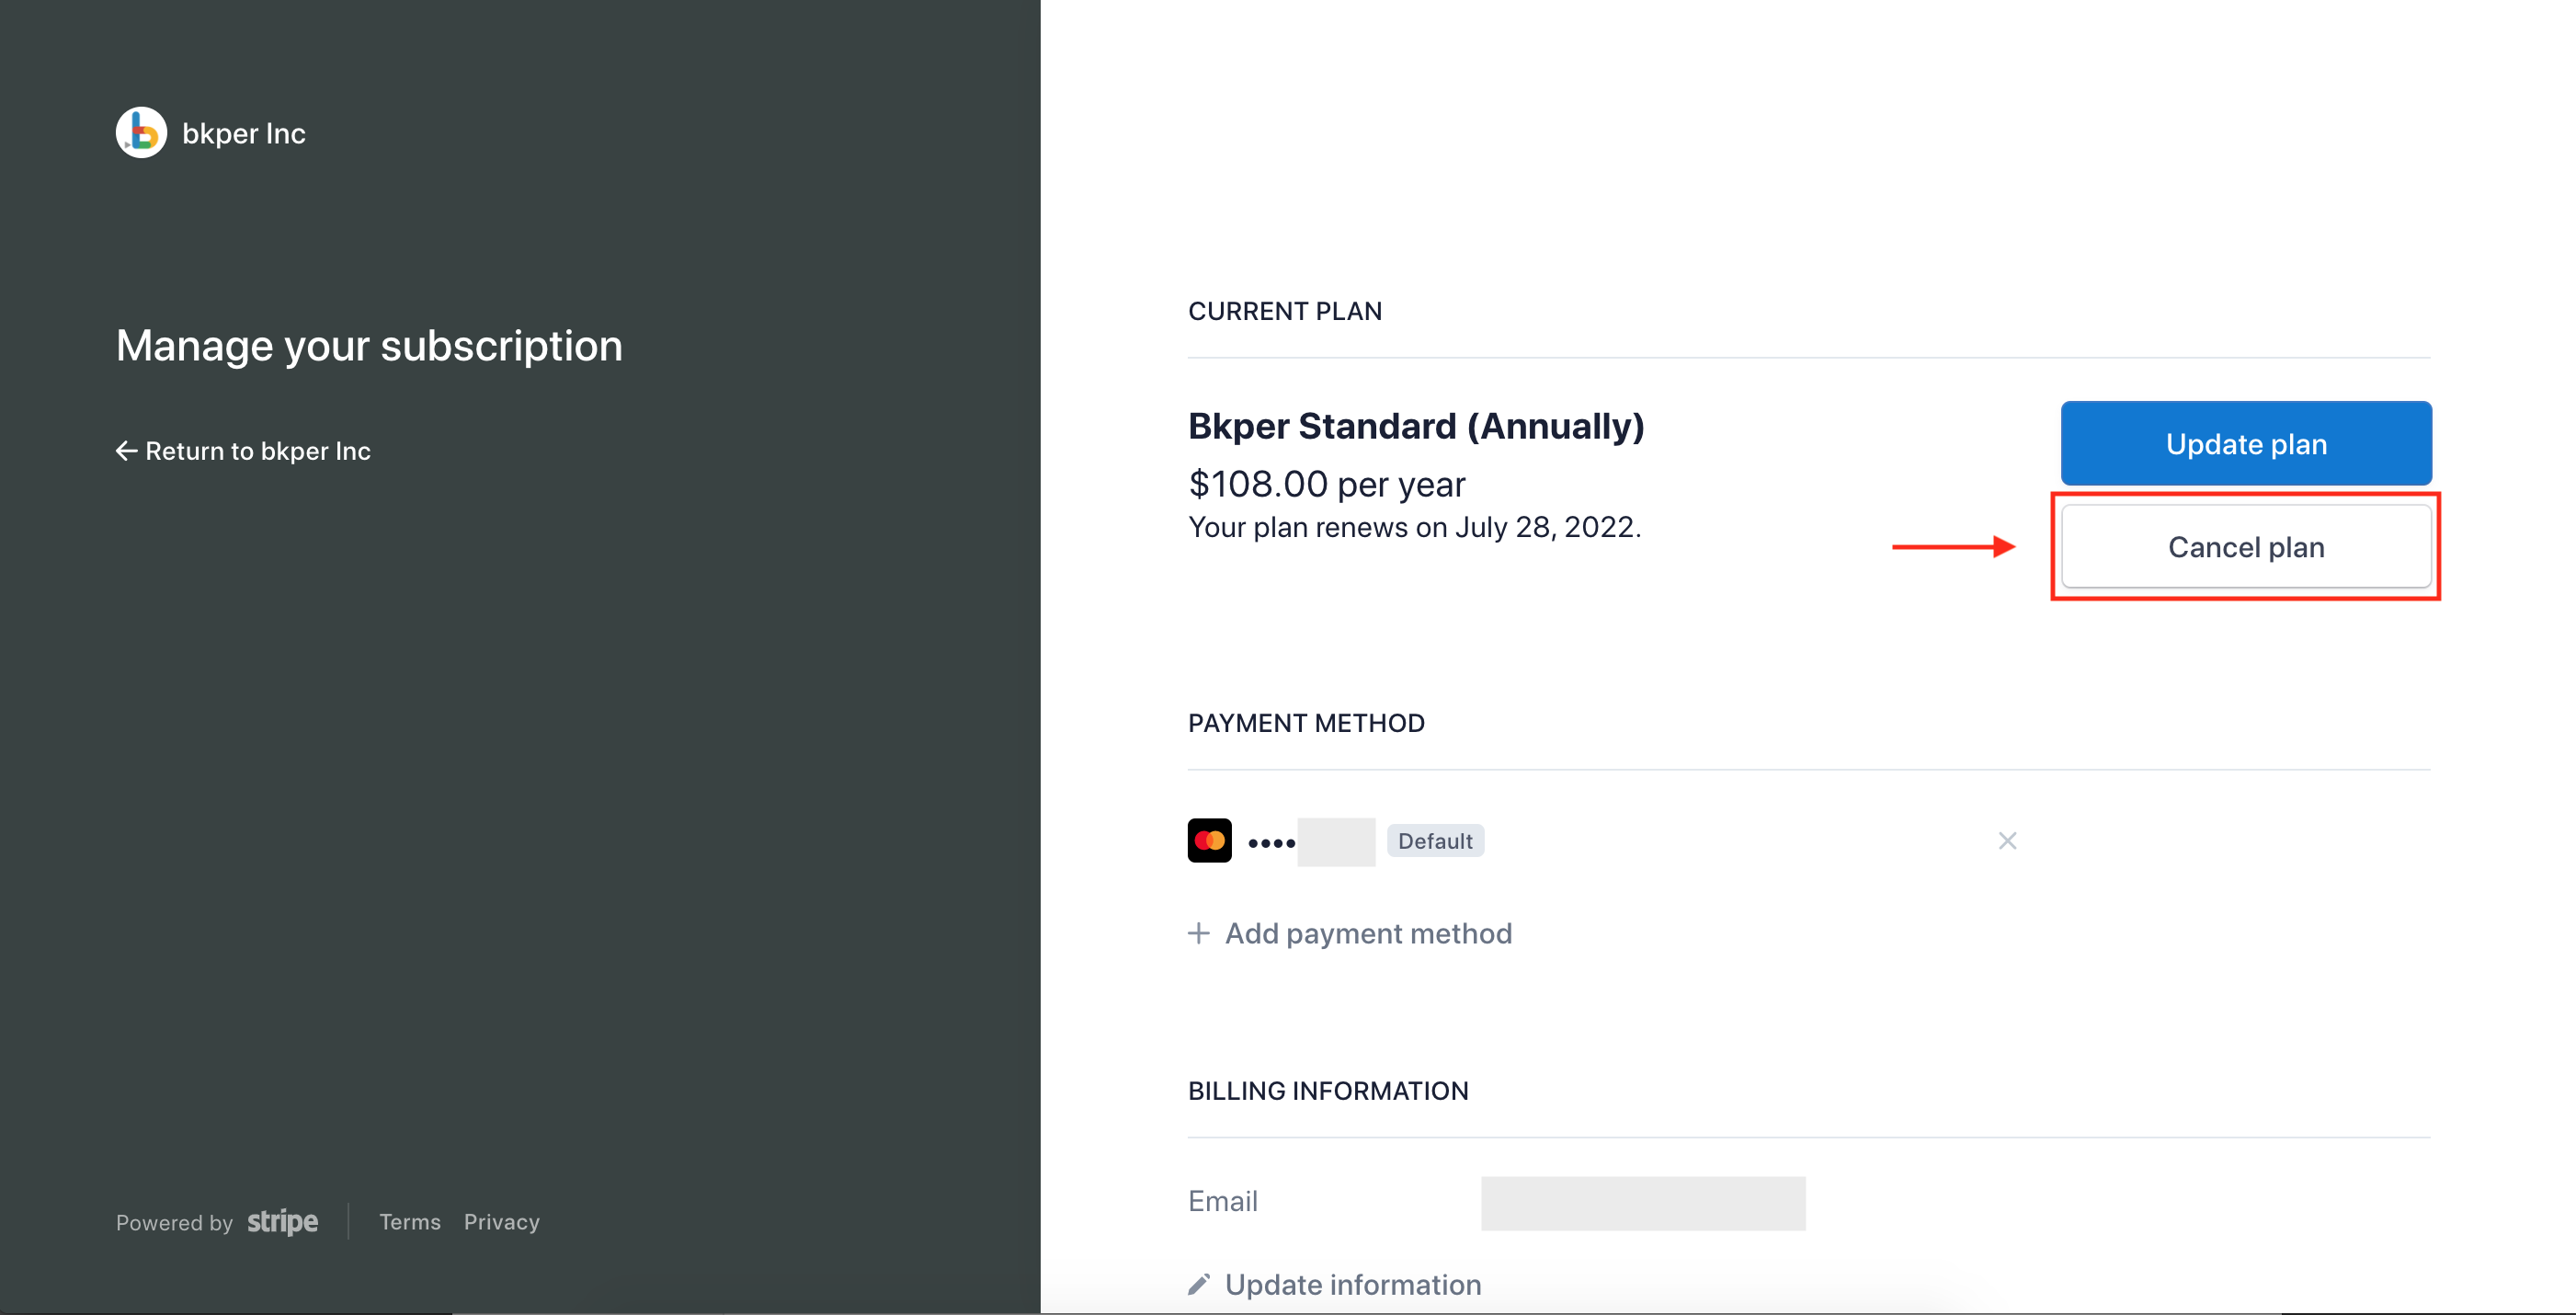
Press the Cancel plan button again to confirm the cancellation.
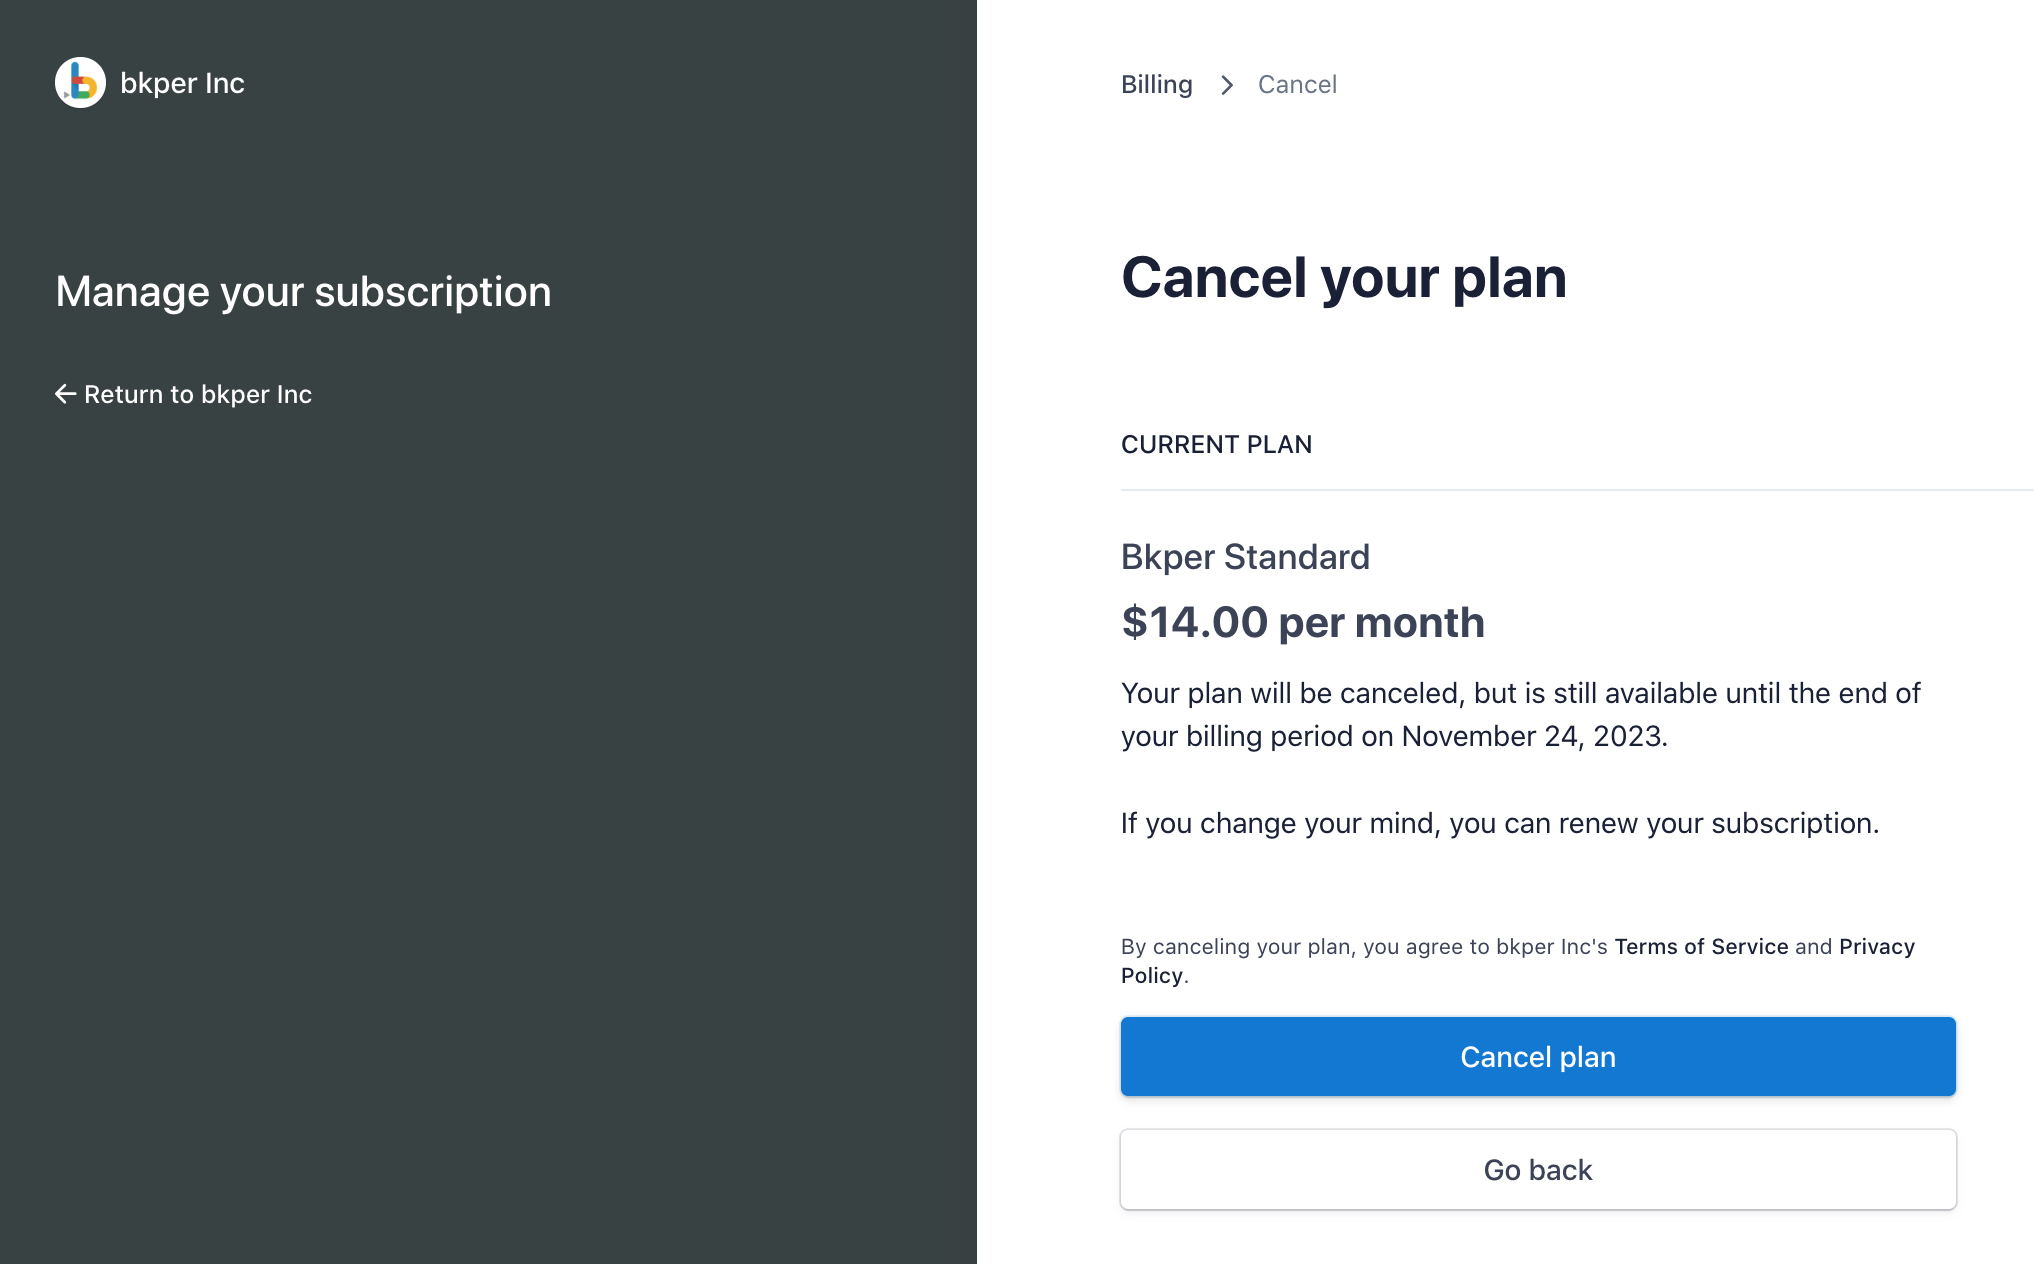
Your plan is now cancelled. Bkper will no longer charge you, and you can continue using the paid features of your tier until the end of the current billing period. After that, your account returns to the Bkper Free tier.
Changing billing period
The Bkper Standard subscription offers a 25% discount on annual billing. Once you’ve confirmed the value of the paid features, you can switch your billing period from monthly to annually — or back to monthly.
On the Billing page, press the Update plan button.
Click the Yearly toggle, then press Continue.
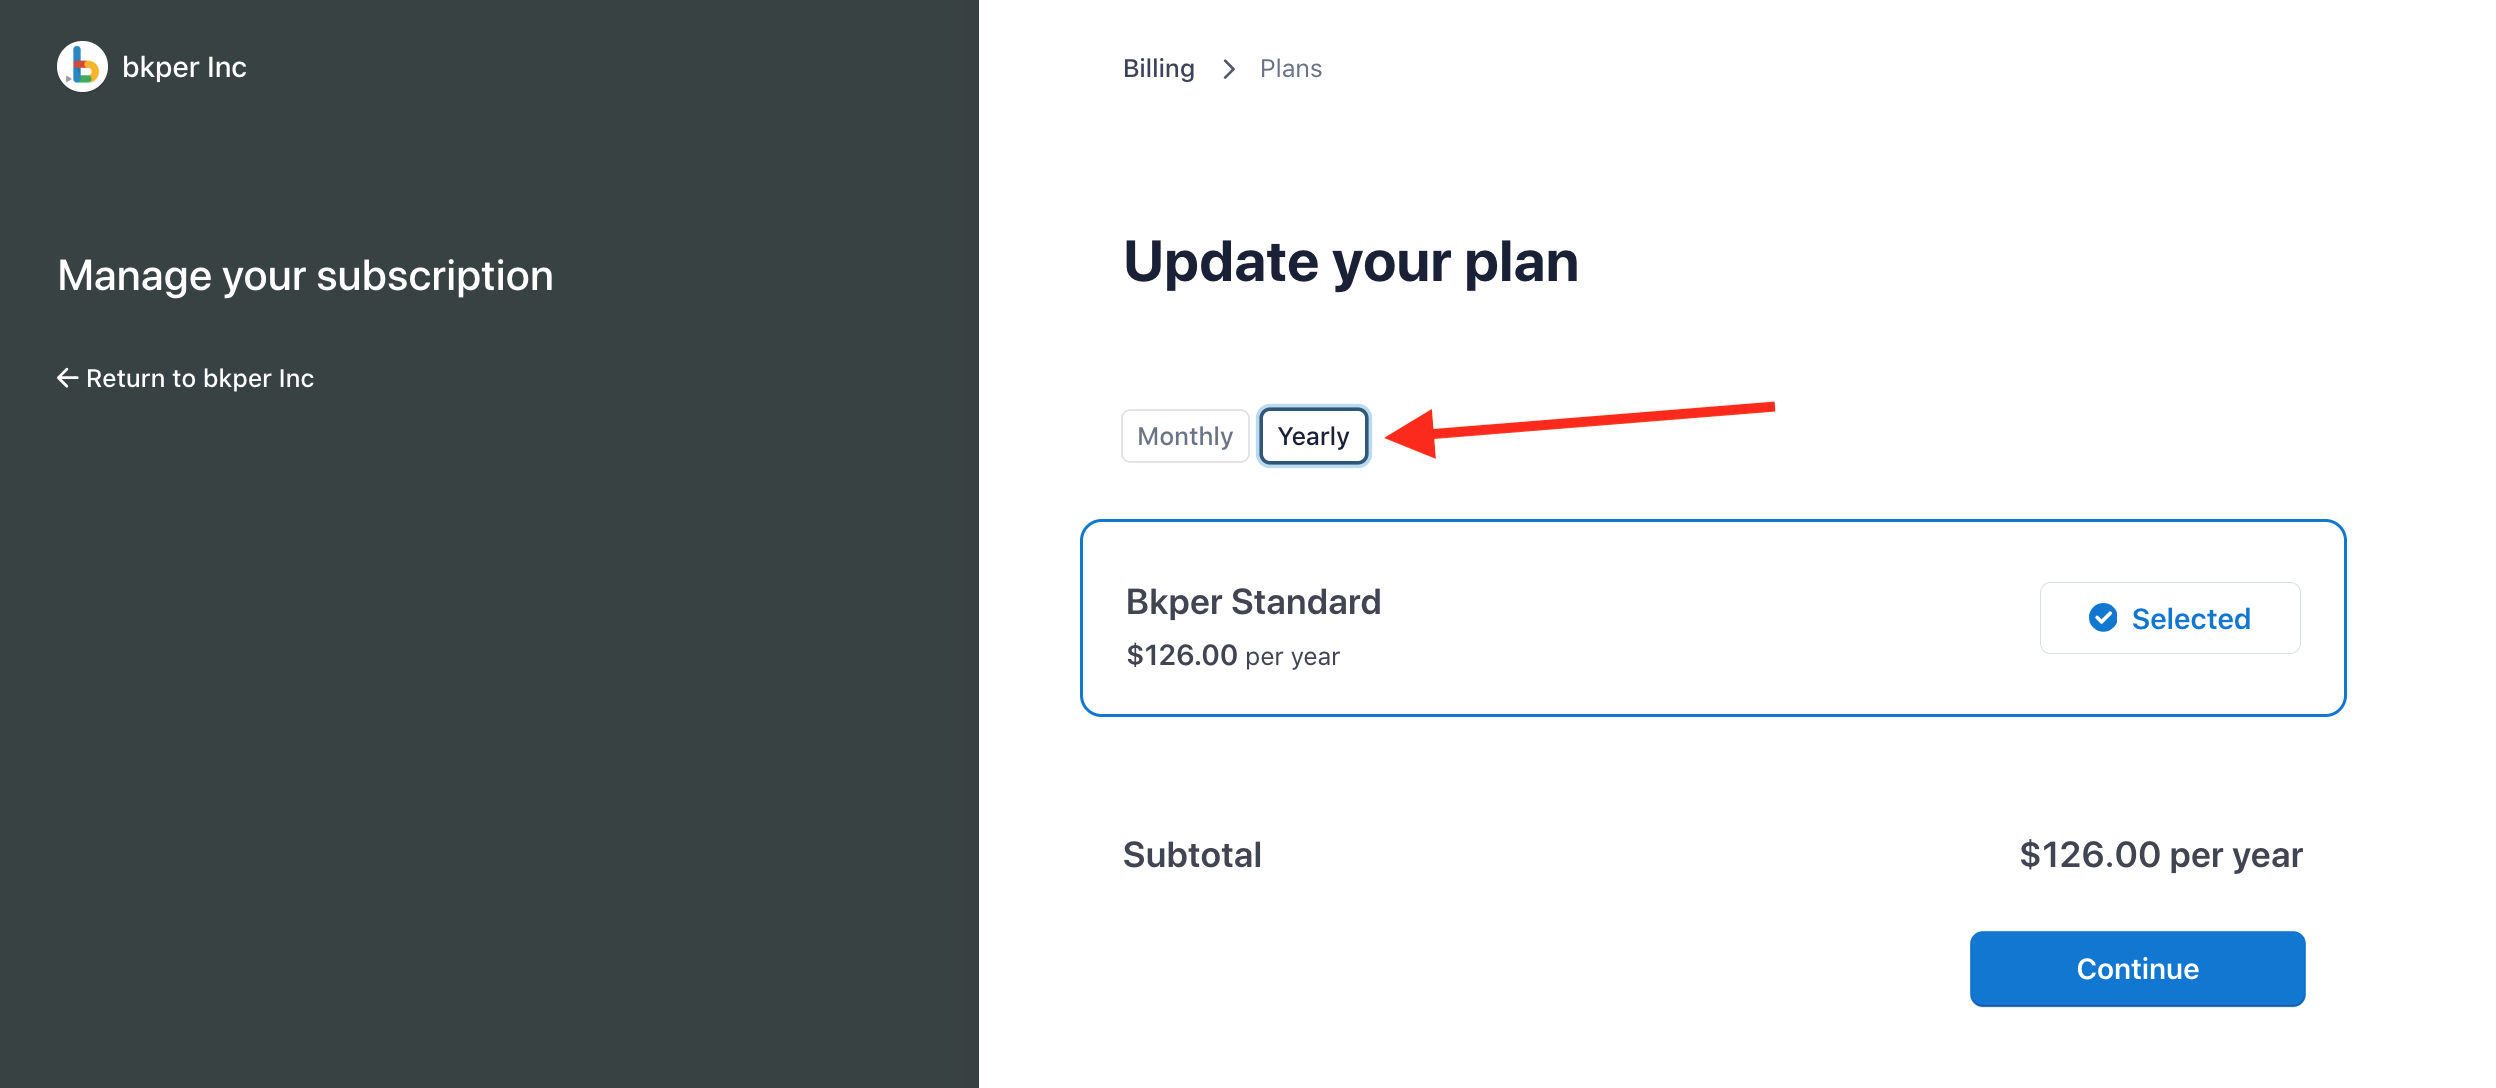
Confirm the update and press Confirm.
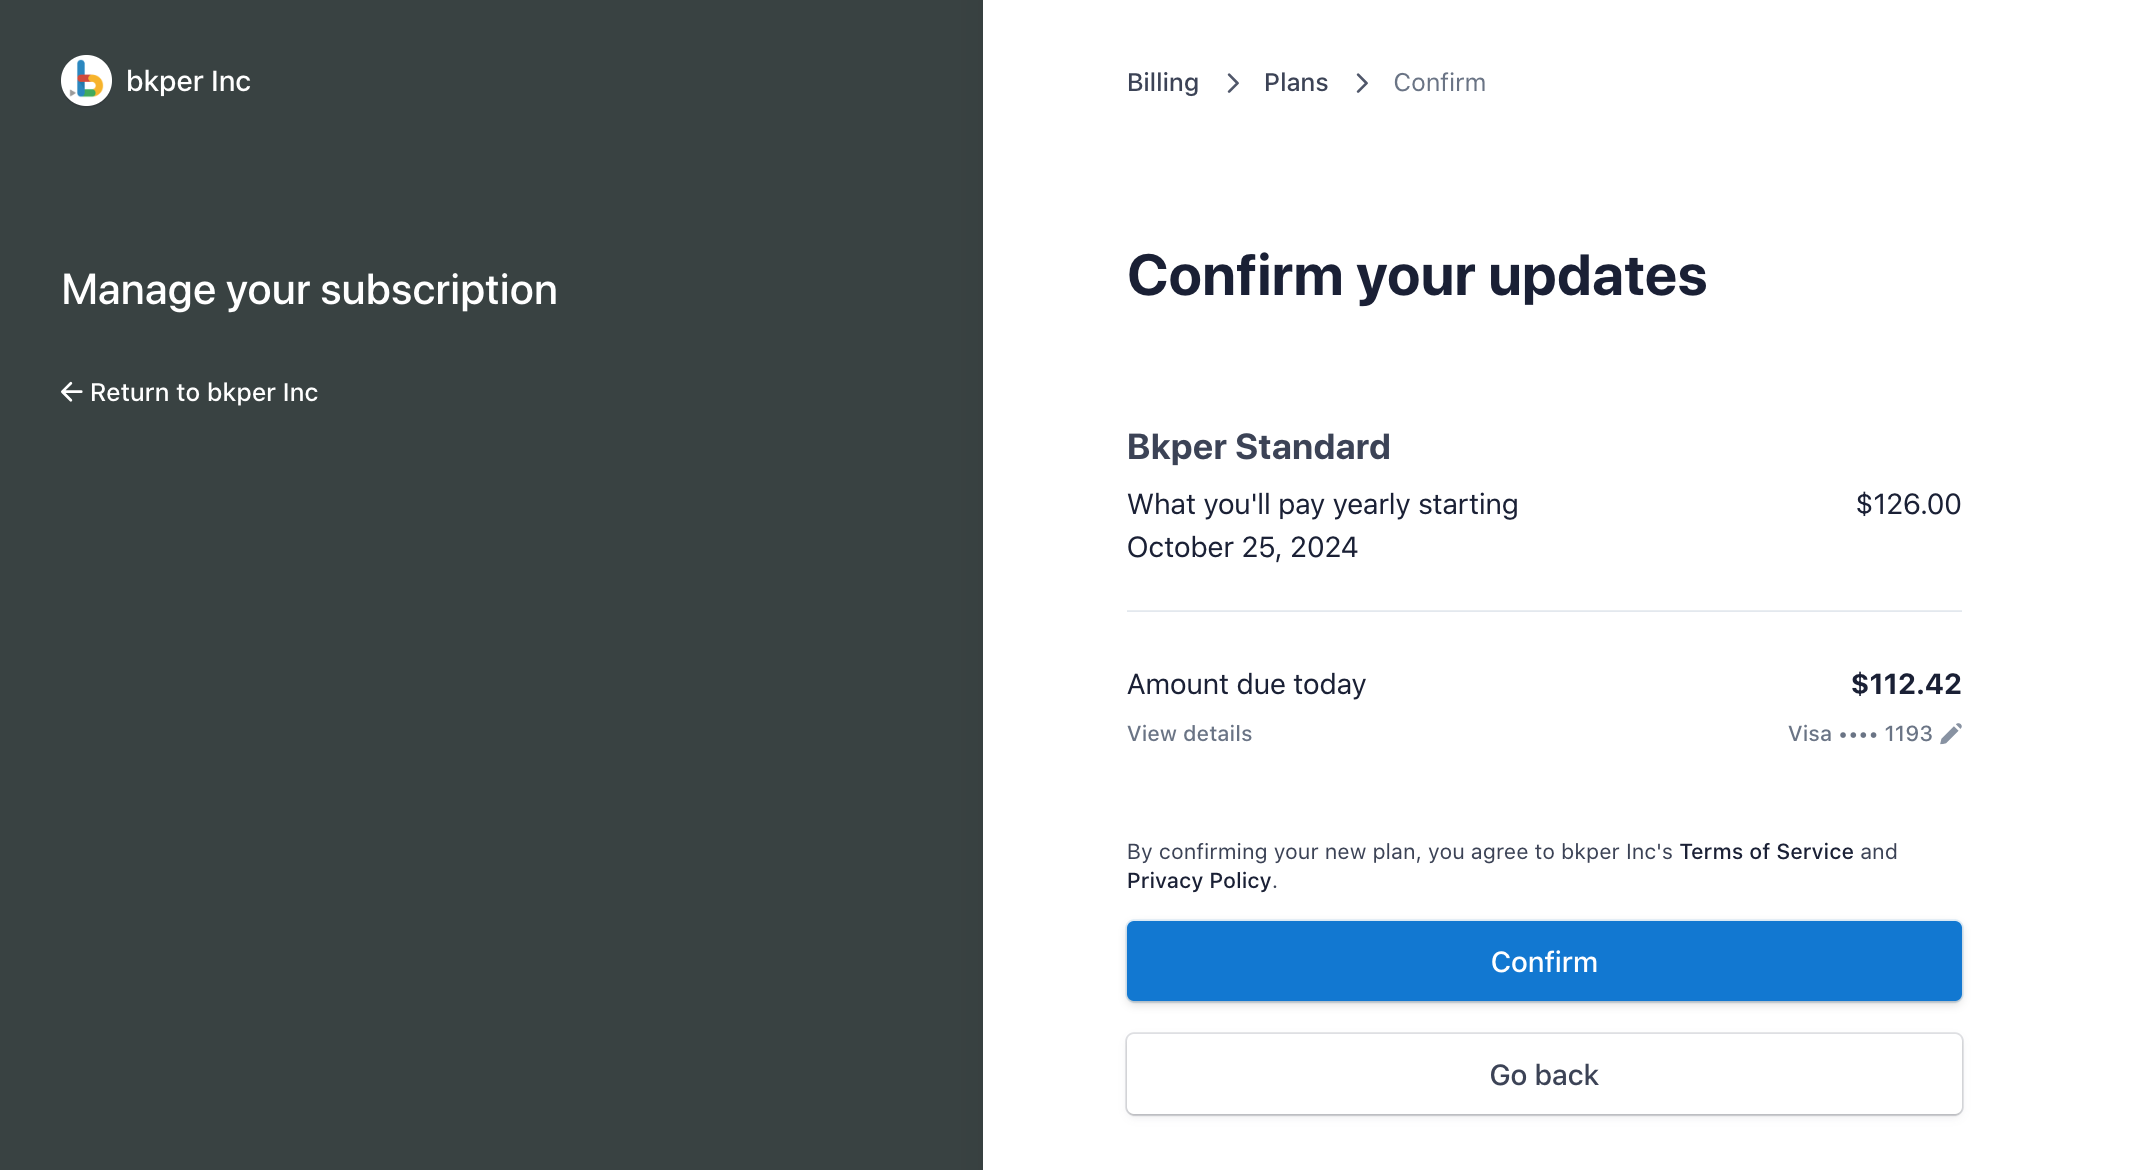
Your billing period has now changed.
Update payment method
You can update your payment details at any time from the Billing page.
Open the Billing page by clicking on your avatar in the top-right corner and selecting Billing.
Press + Add payment method.
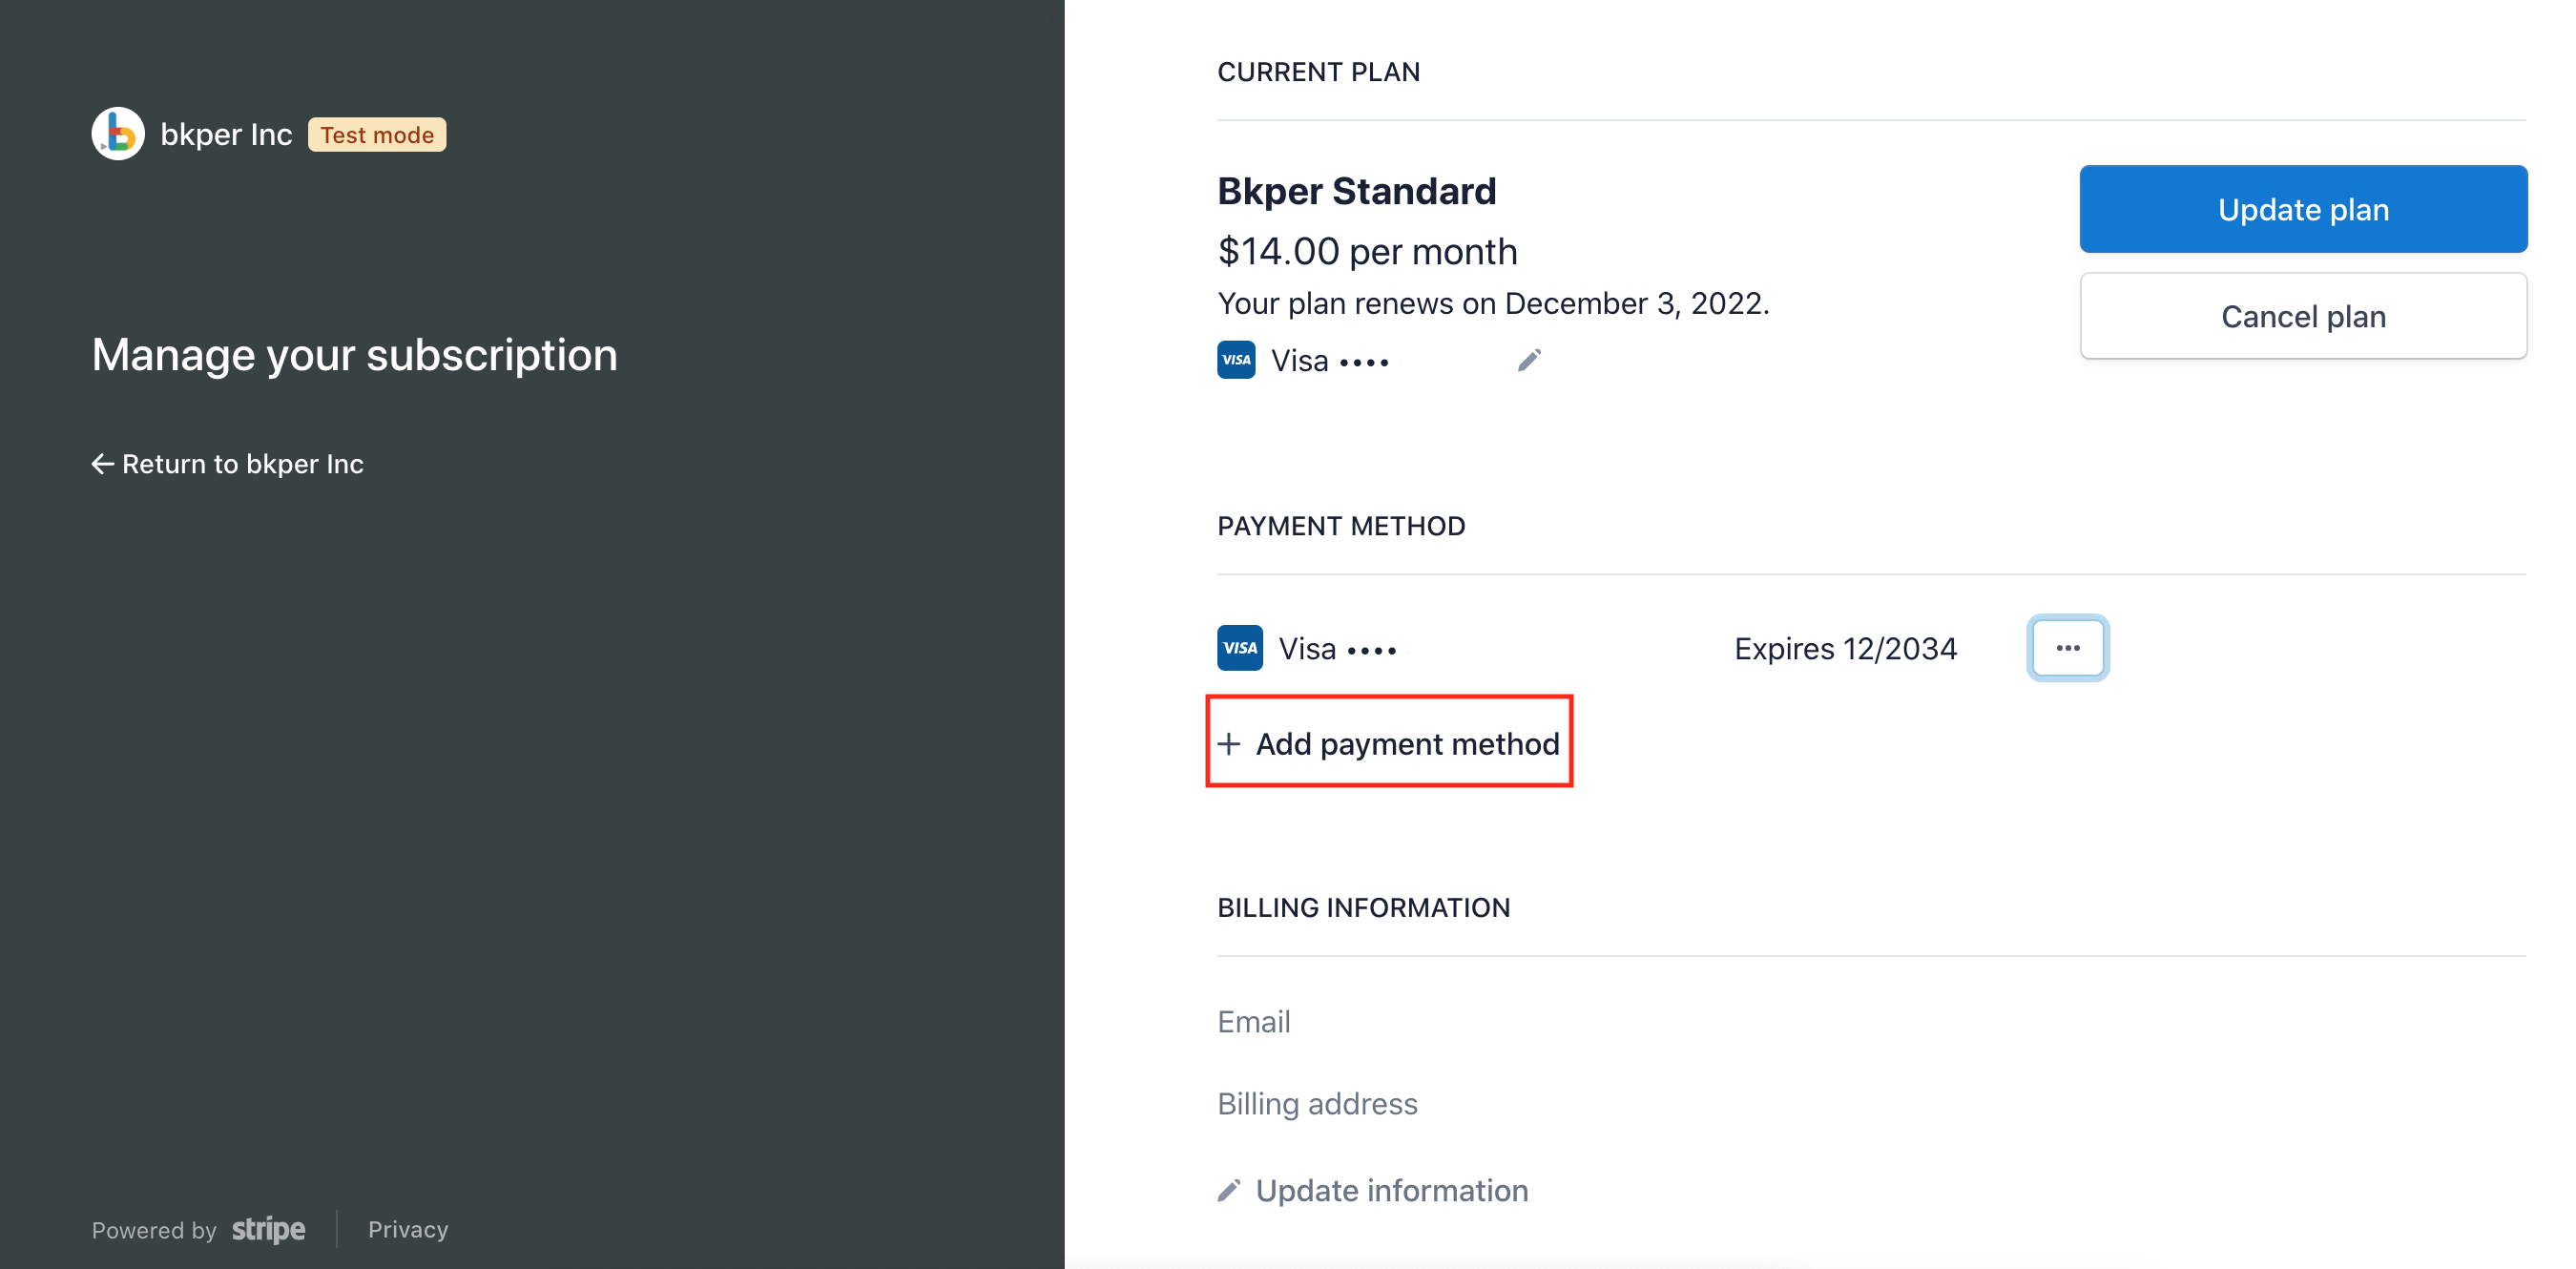
Fill out the form with the new card details and check Use as default payment method.
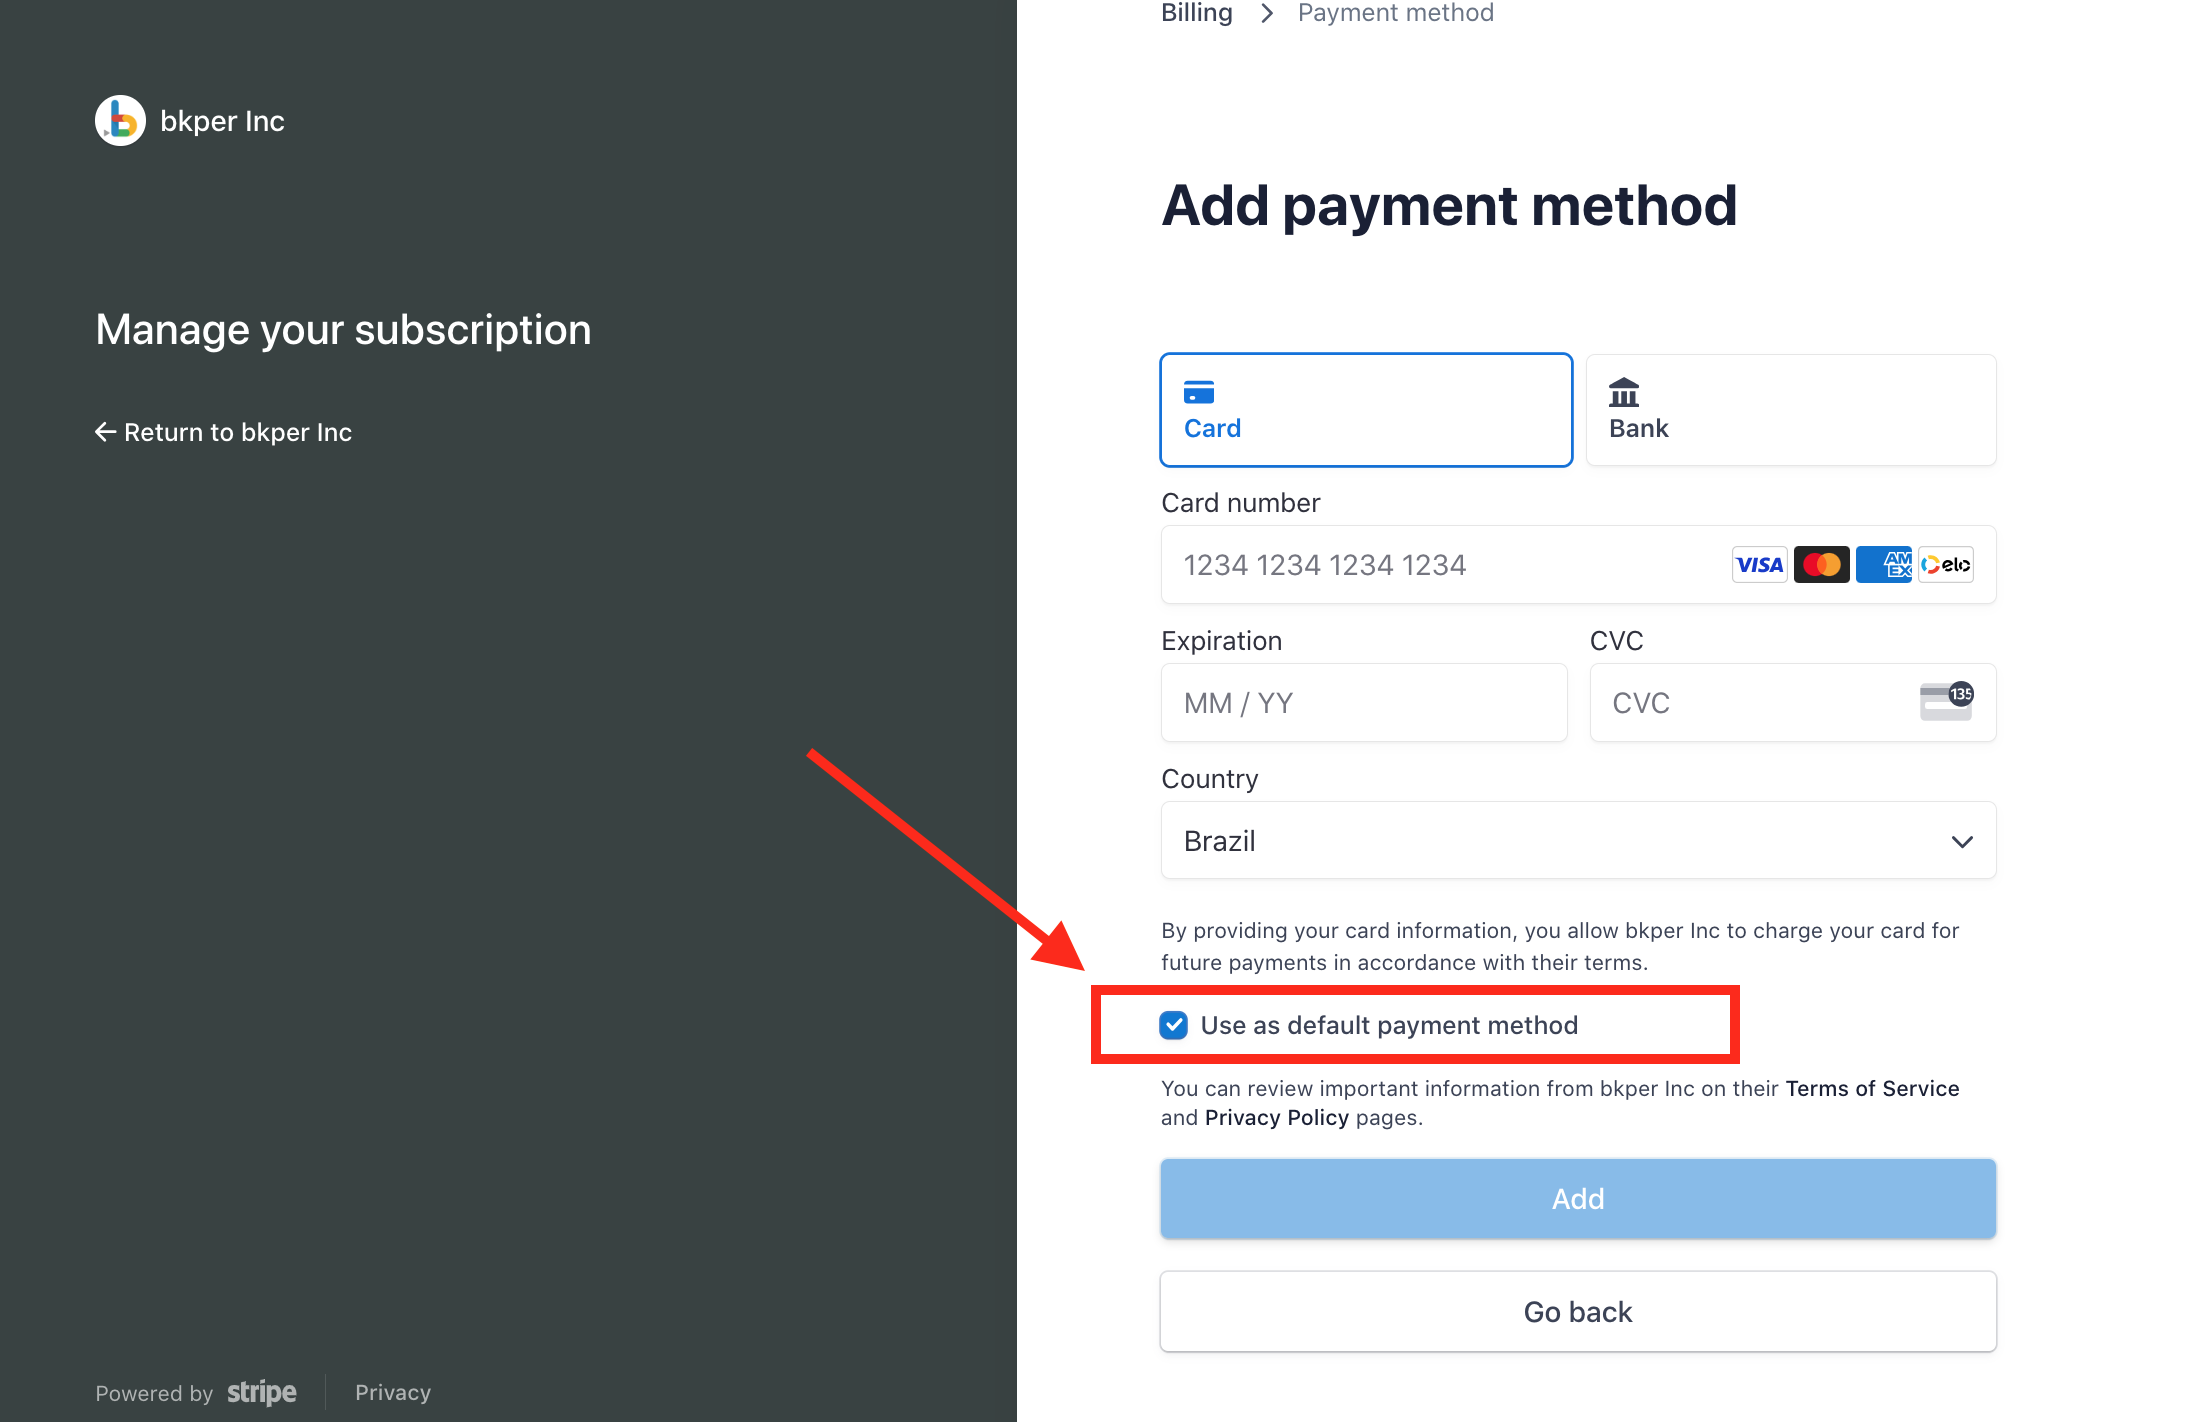
Press the Add button. Your payment method is now updated.
Declined and failed payments
Payments can fail for a variety of reasons. Together with Stripe, Bkper does its best to avoid payment issues and collect charges normally. When a payment does not go through, Bkper tries to indicate the reason and provide steps to resolve the failure.
Unfortunately, for privacy and security reasons, card issuers only discuss the specific reasons for declined payments with the cardholder — they cannot share those details with Bkper. In these cases, the best course of action is to contact your card issuer directly and ask them for more information about the decline.
Invoices and receipts
Sign in to Bkper and click on your avatar in the top-right corner.
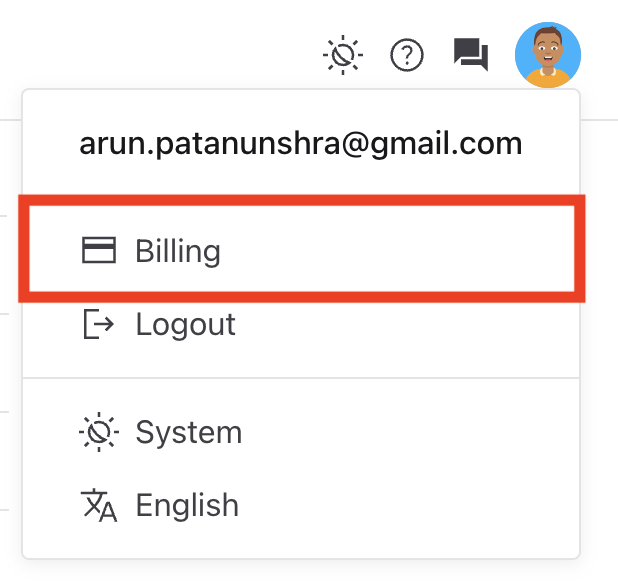
Select Billing from the dropdown menu. Your billing page opens.
On the billing page you can find information about your:
- Subscription Plan
- Payment Methods
- Billing information
- Invoice History
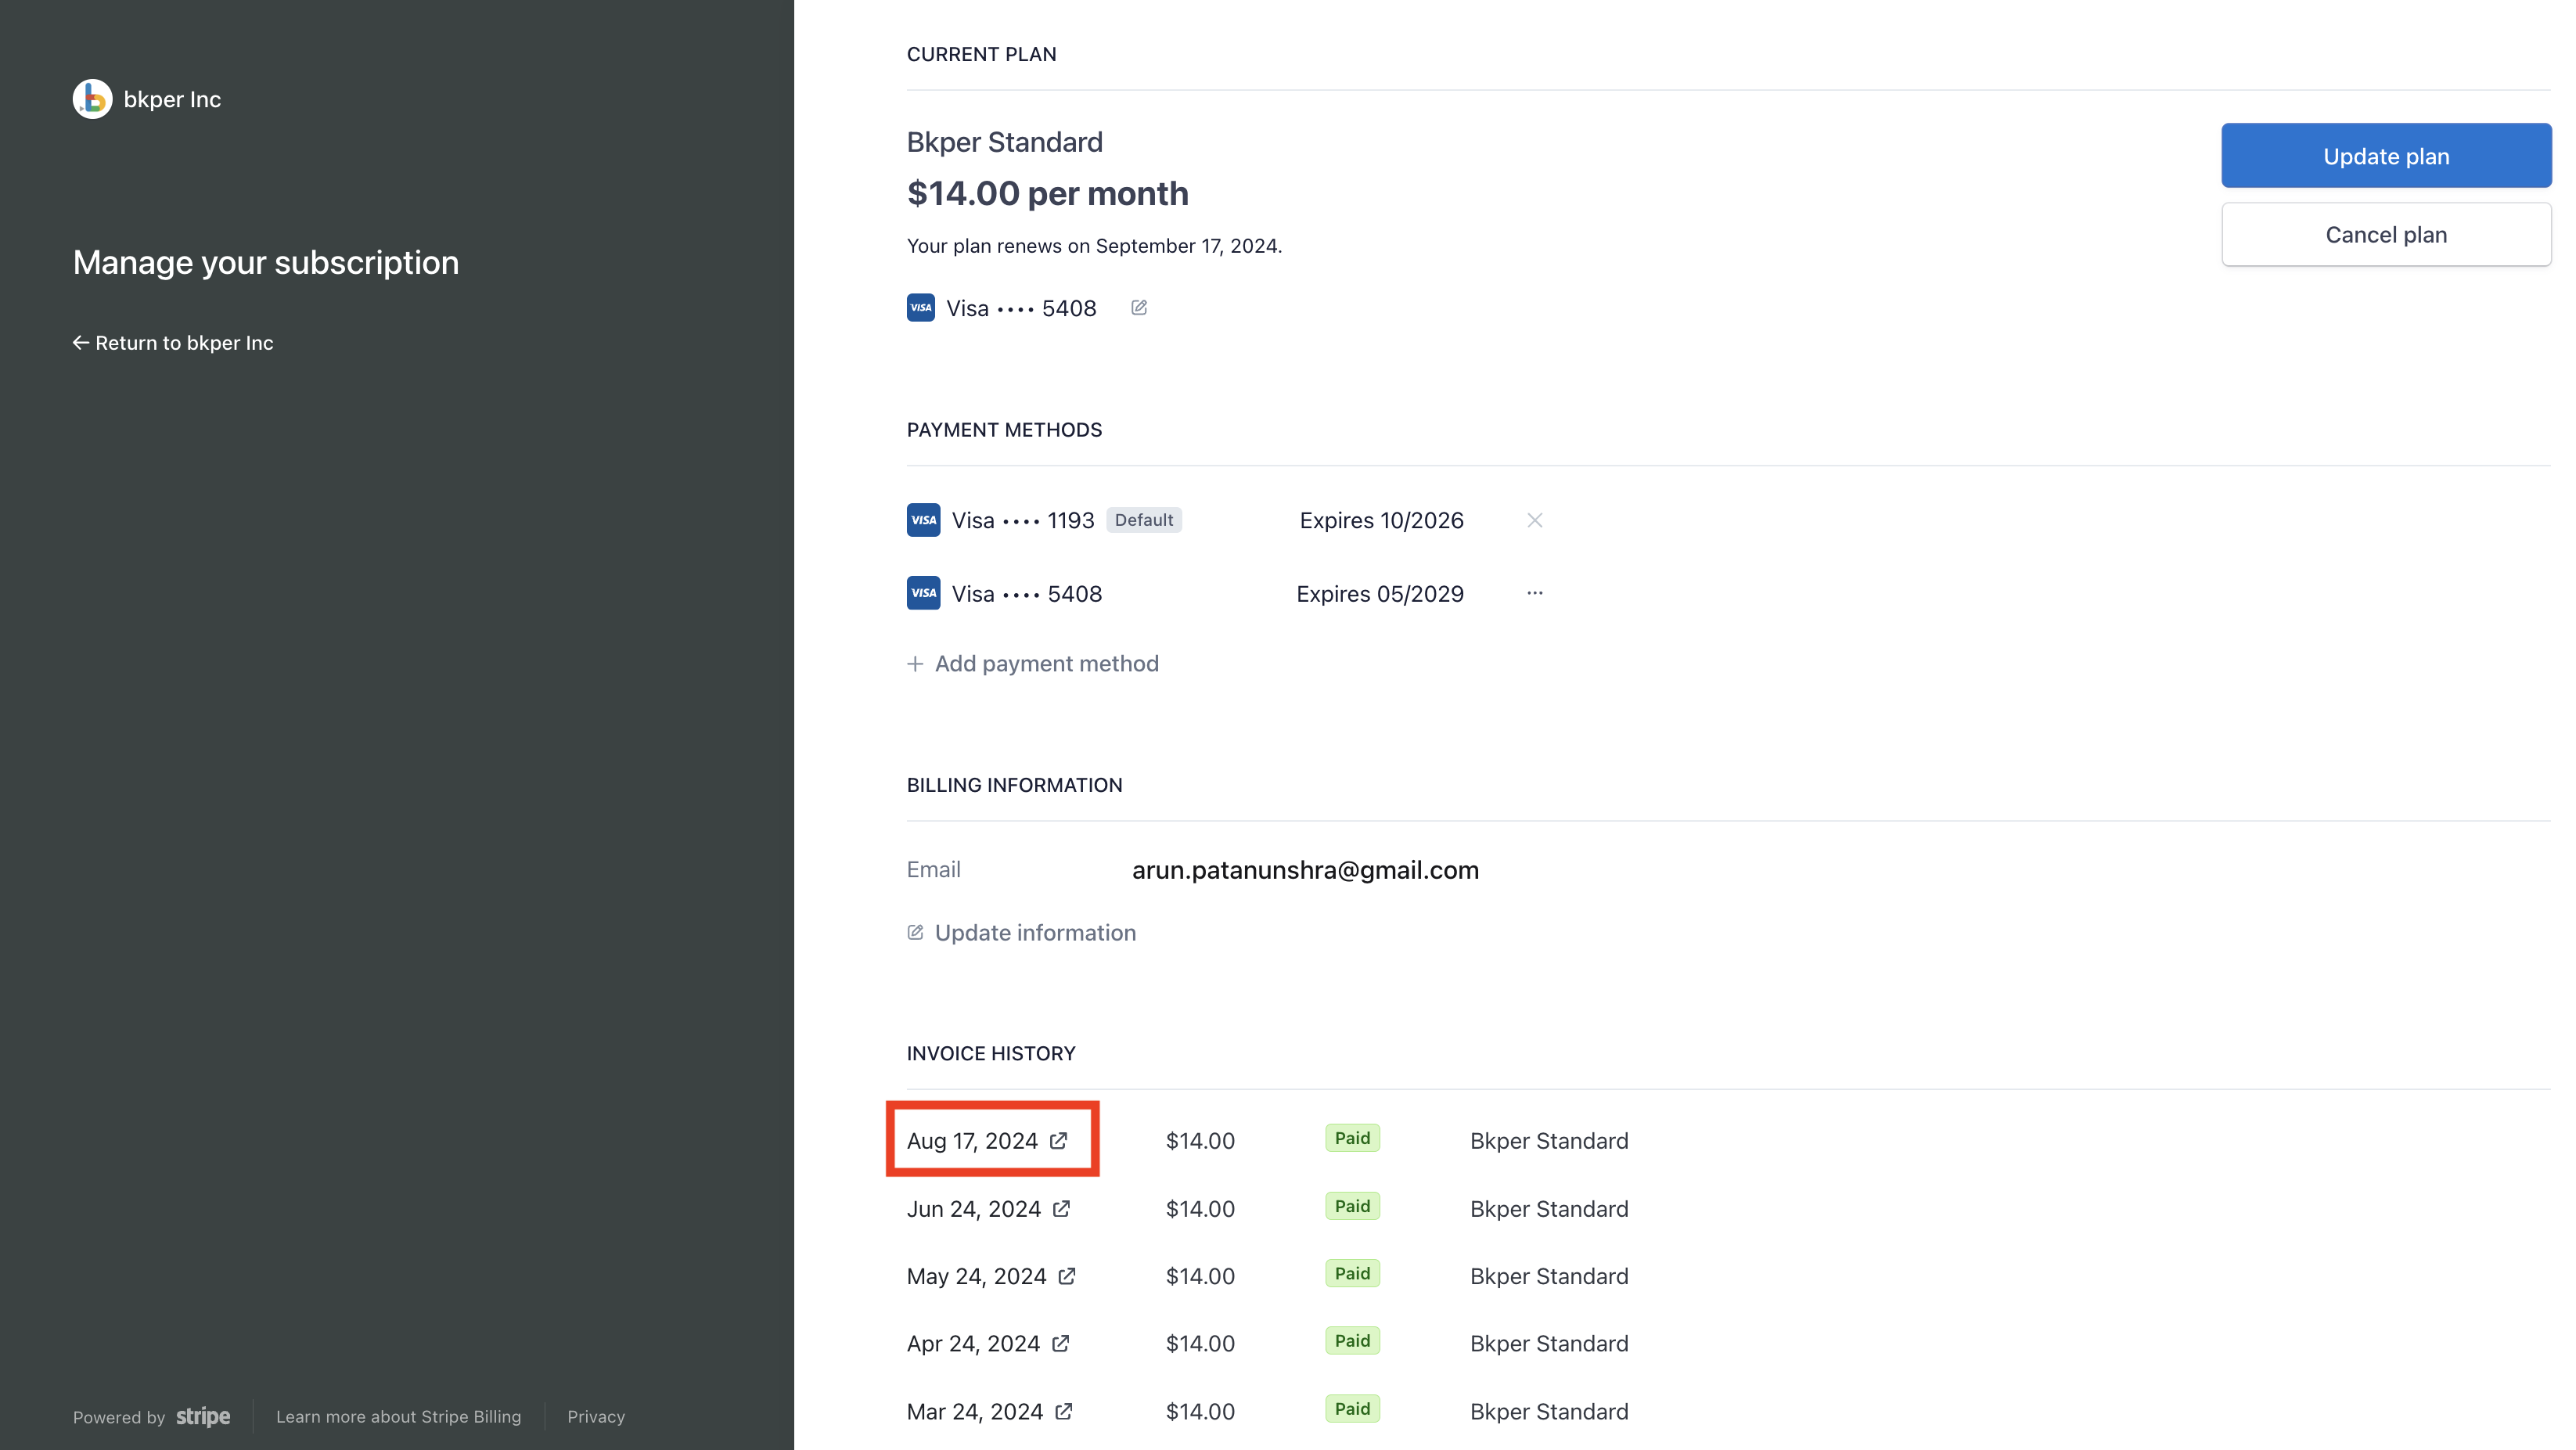
Scroll down to the Invoice history section and click on the date of the invoice or receipt you need.
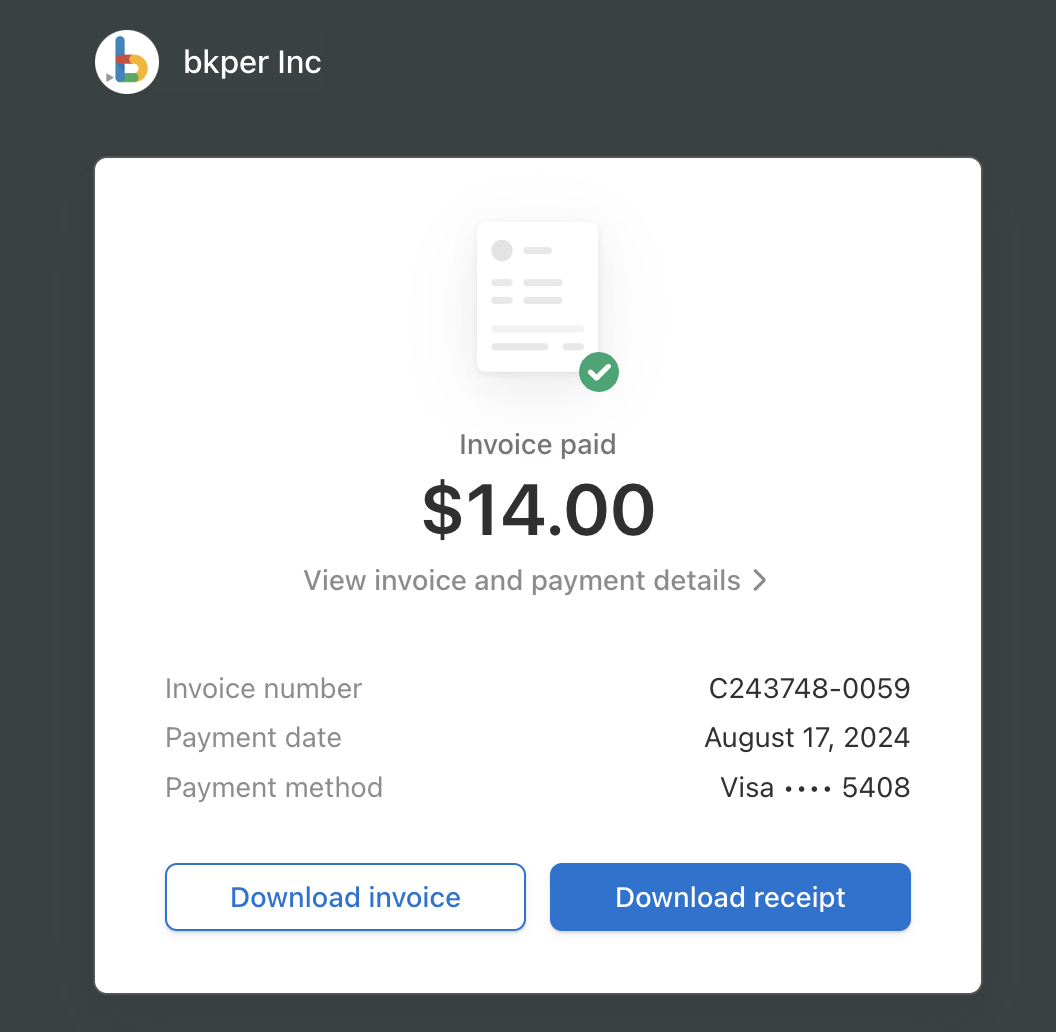
From the window that opens, select:
- Download invoice
- Download receipt
If you have any questions about your billing or subscription plans, reach out through Bkper support.