Chart of Accounts
How to build and organize a Chart of Accounts in Bkper — grouping, hierarchies, and scaling from simple to complex.
A Chart of Accounts is a list of accounts used by an entity, often following a Generally Accepted Accounting Standard (GAAP) for uniformity and understanding by third parties like analysts and auditors.
Bkper’s Chart of Accounts offers the same functionality with greater flexibility, aligning with GAAP standards like Balance Sheets and Income Statements, while also serving managerial purposes such as tracking results and cost management.
Grouping accounts
A Group in Bkper’s Chart of Accounts is a powerful tool for categorizing related accounts. It combines and calculates the total balance of all accounts within the group, simplifying data presentation and improving financial analysis.
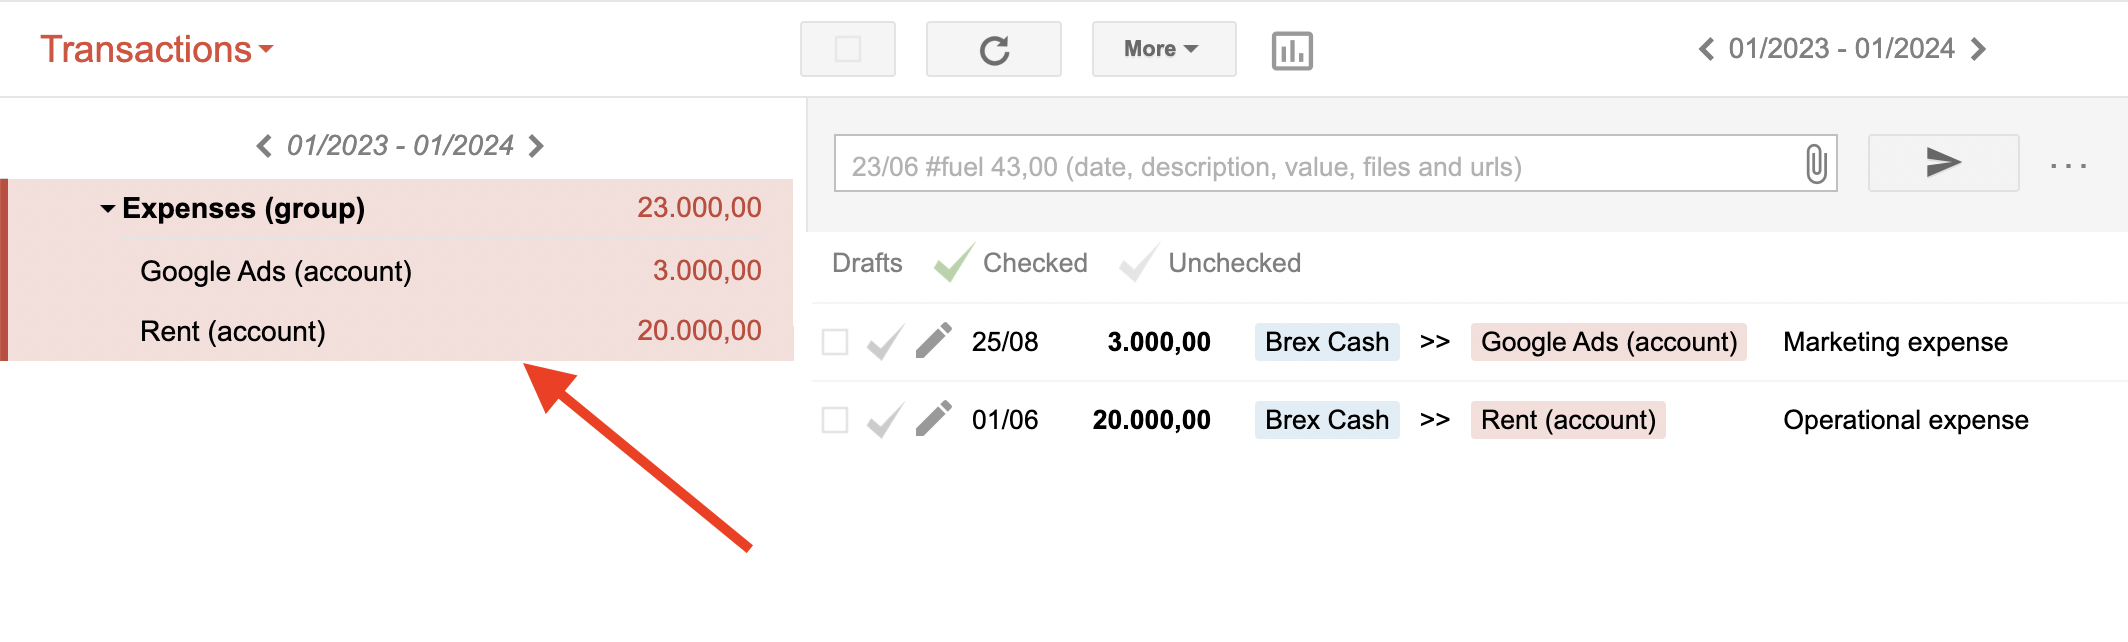
Think of a Group as a container for similar accounts. For example, an Expenses group gathers various related accounts together.
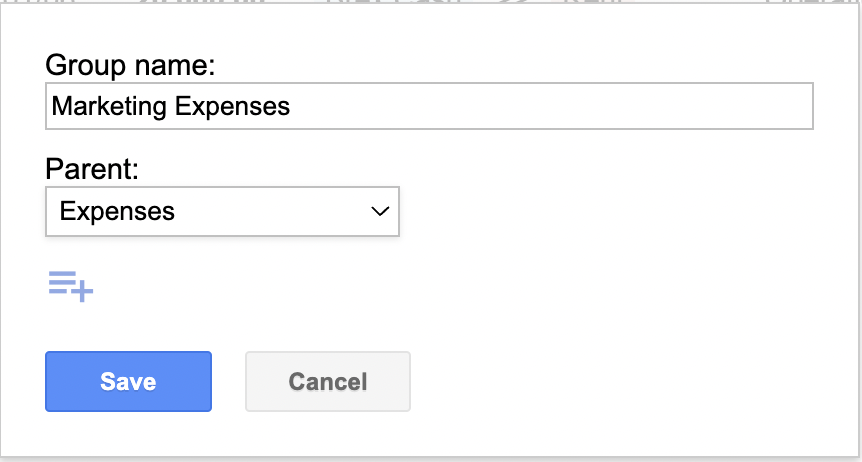
As your financial records evolve, you might need more specific categories like Marketing Expenses and Operational Expenses. You can create these subgroups and categorize your existing accounts accordingly.
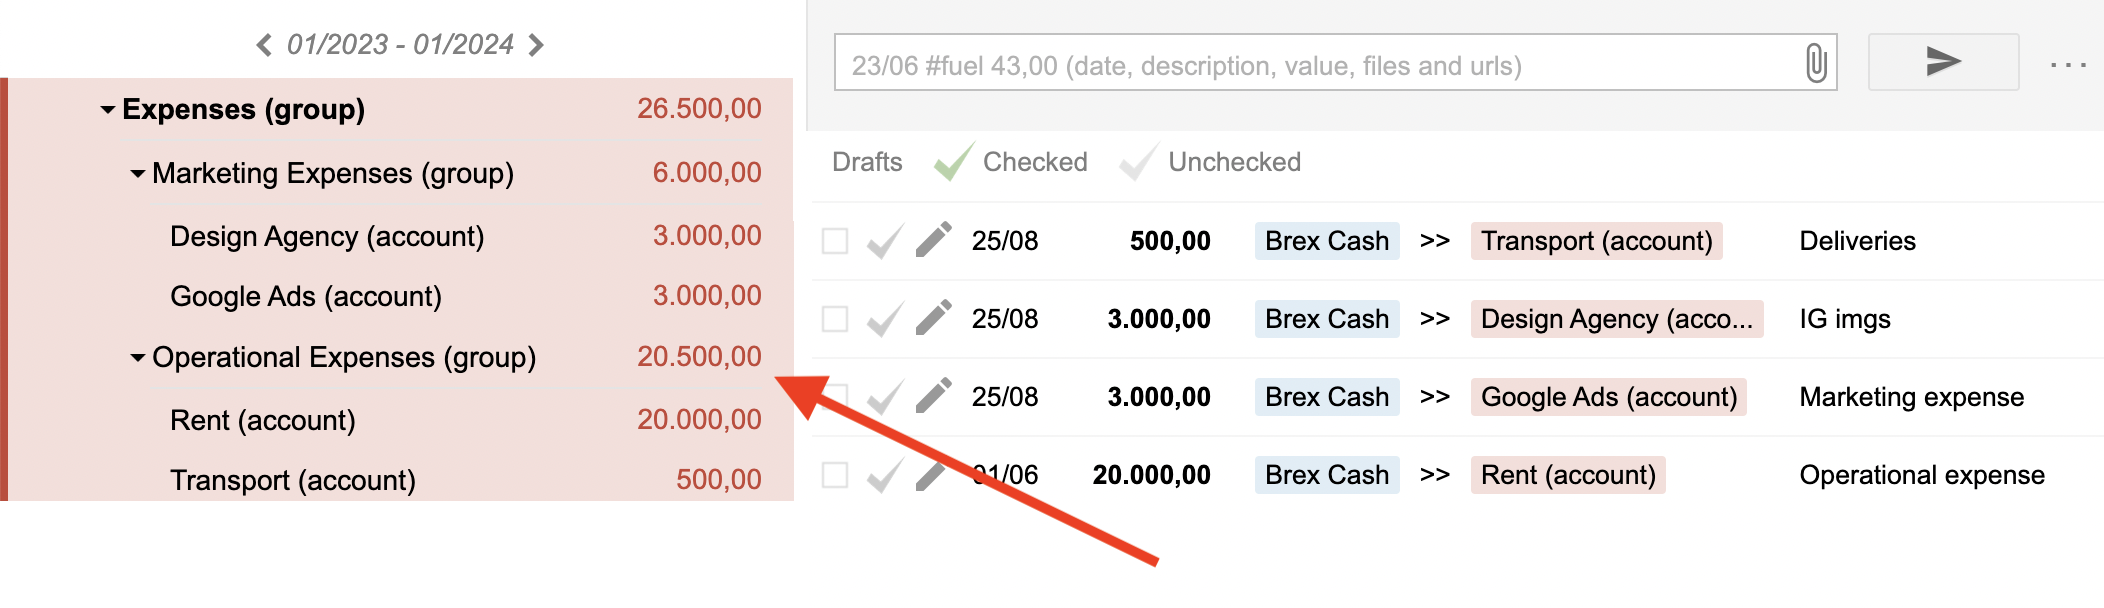
The beauty of this flexibility is that you can maintain the original group as the parent while further detailing subcategories and accounts.
Financial insights through grouping
In your Chart of Accounts, you can represent different financial categories — Expenses, Costs, Revenues, Assets, Liabilities — but you can also represent Incomes and Equities by grouping different Account Types.
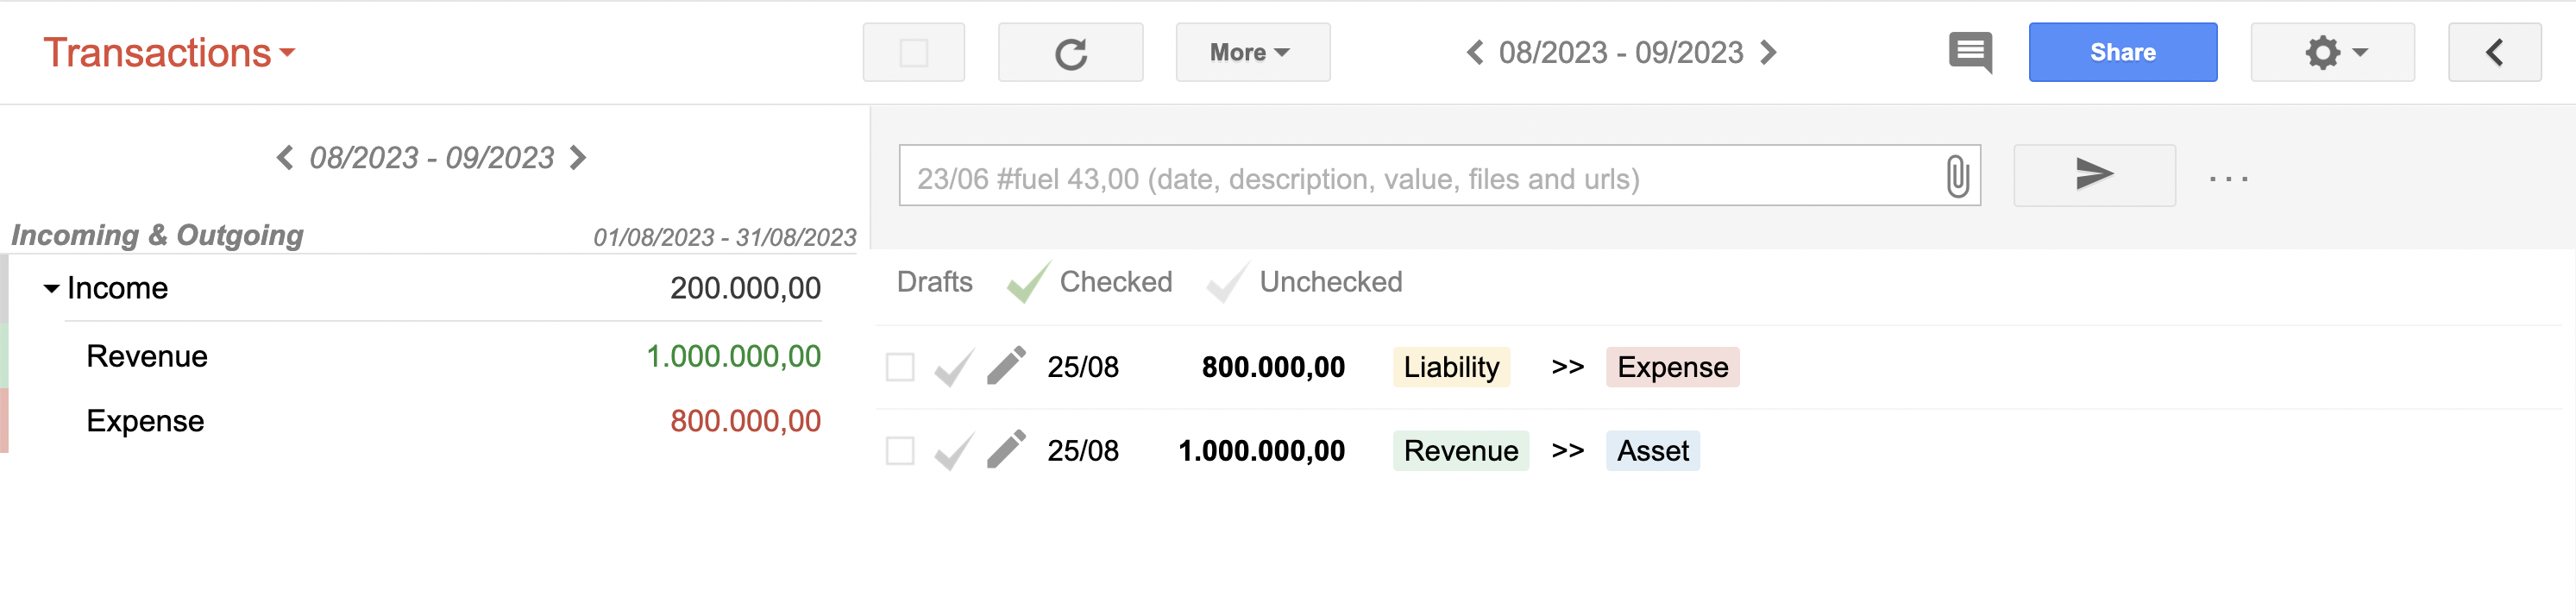
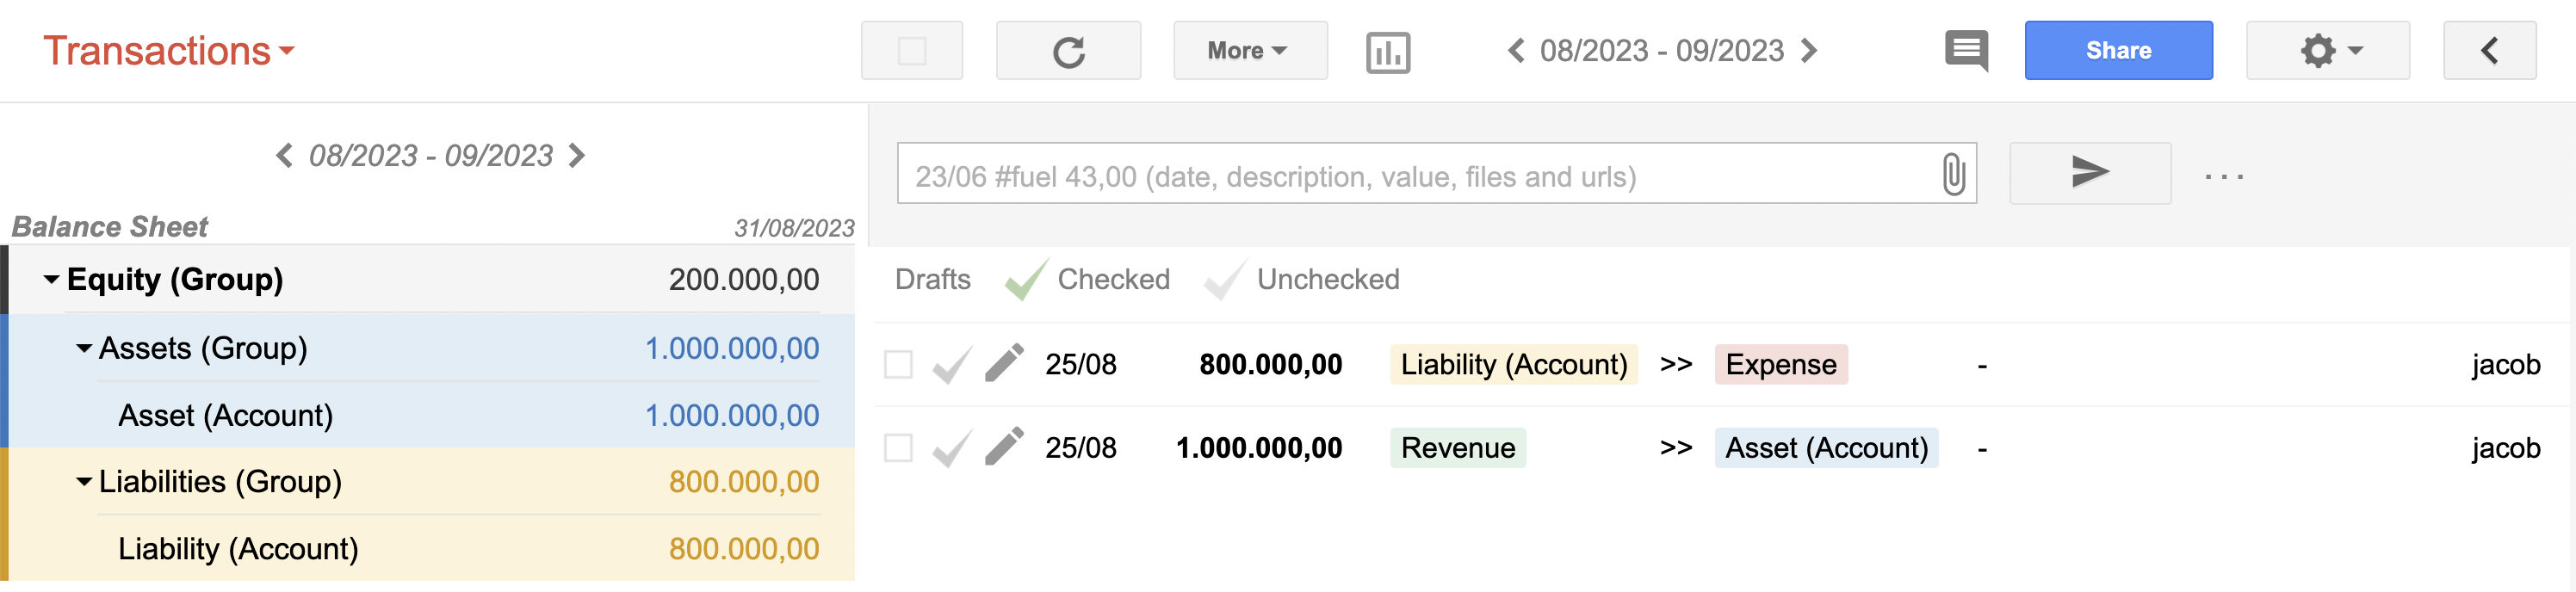
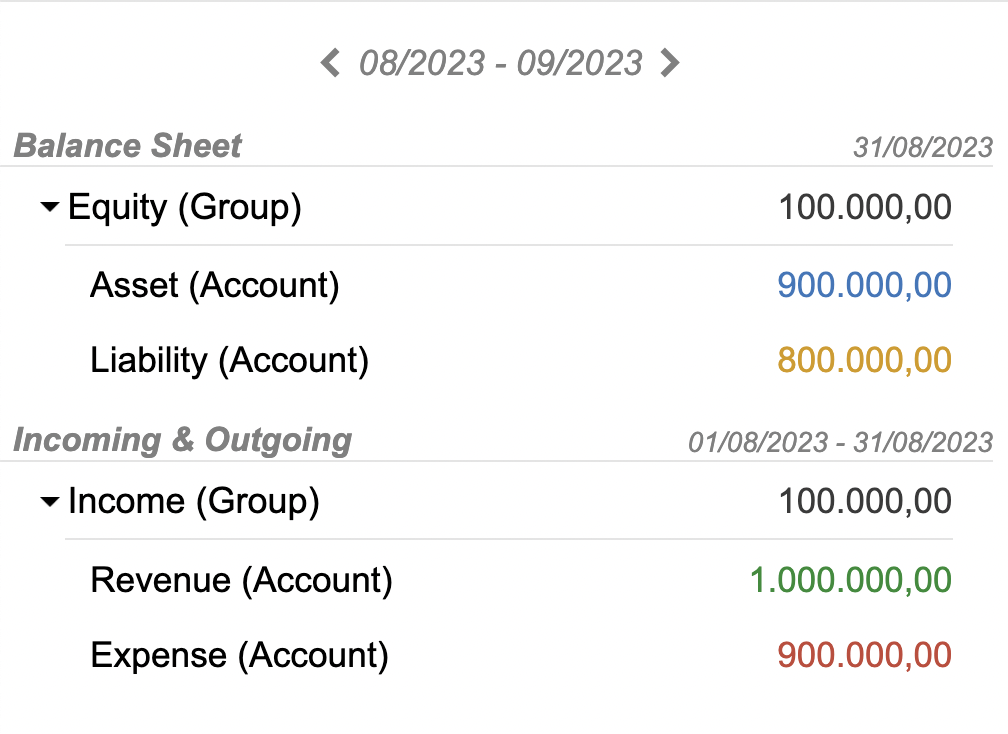
Incoming (green) and Outgoing (red) type accounts together in one group give an Income result.
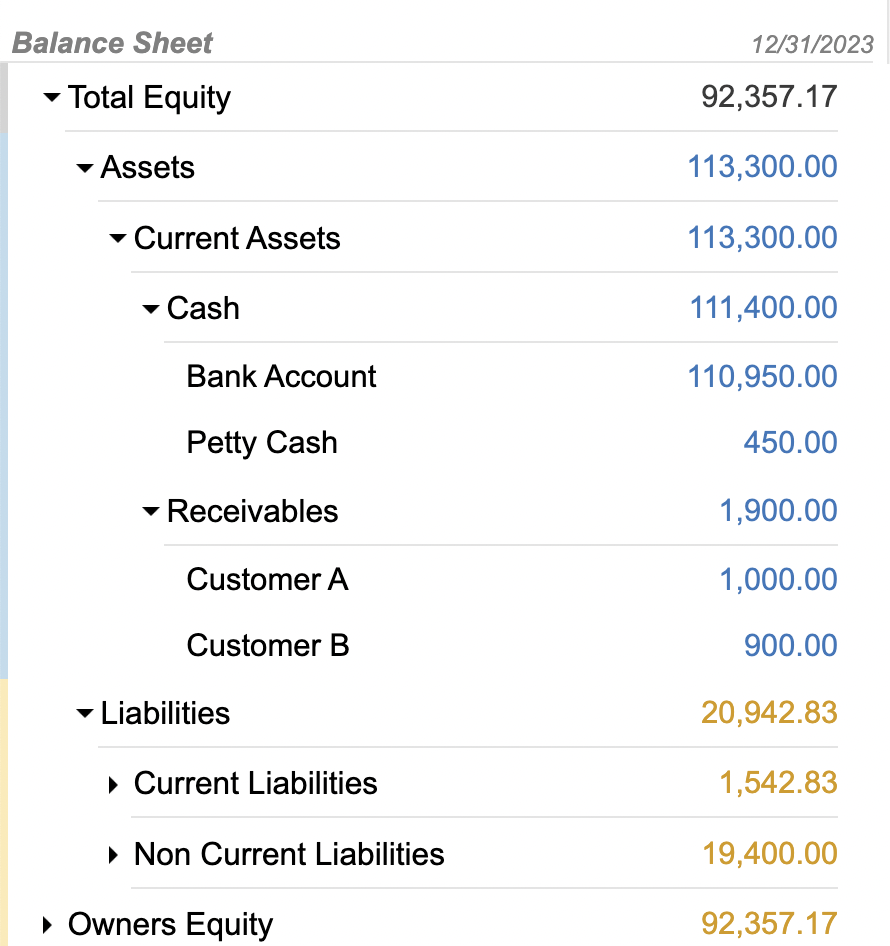
On the Balance Sheet, grouping Asset (blue) and Liability (yellow) type accounts gives you the Equity position.
Scaling your Chart of Accounts
Start simple — Begin with a basic Chart of Accounts that covers your essentials. You can start with just four accounts (Assets, Liabilities, Revenue, and Expenses) and two groups (Equity and Income). Minimalistic, yet it provides a solid foundation for understanding your financial position and performance.
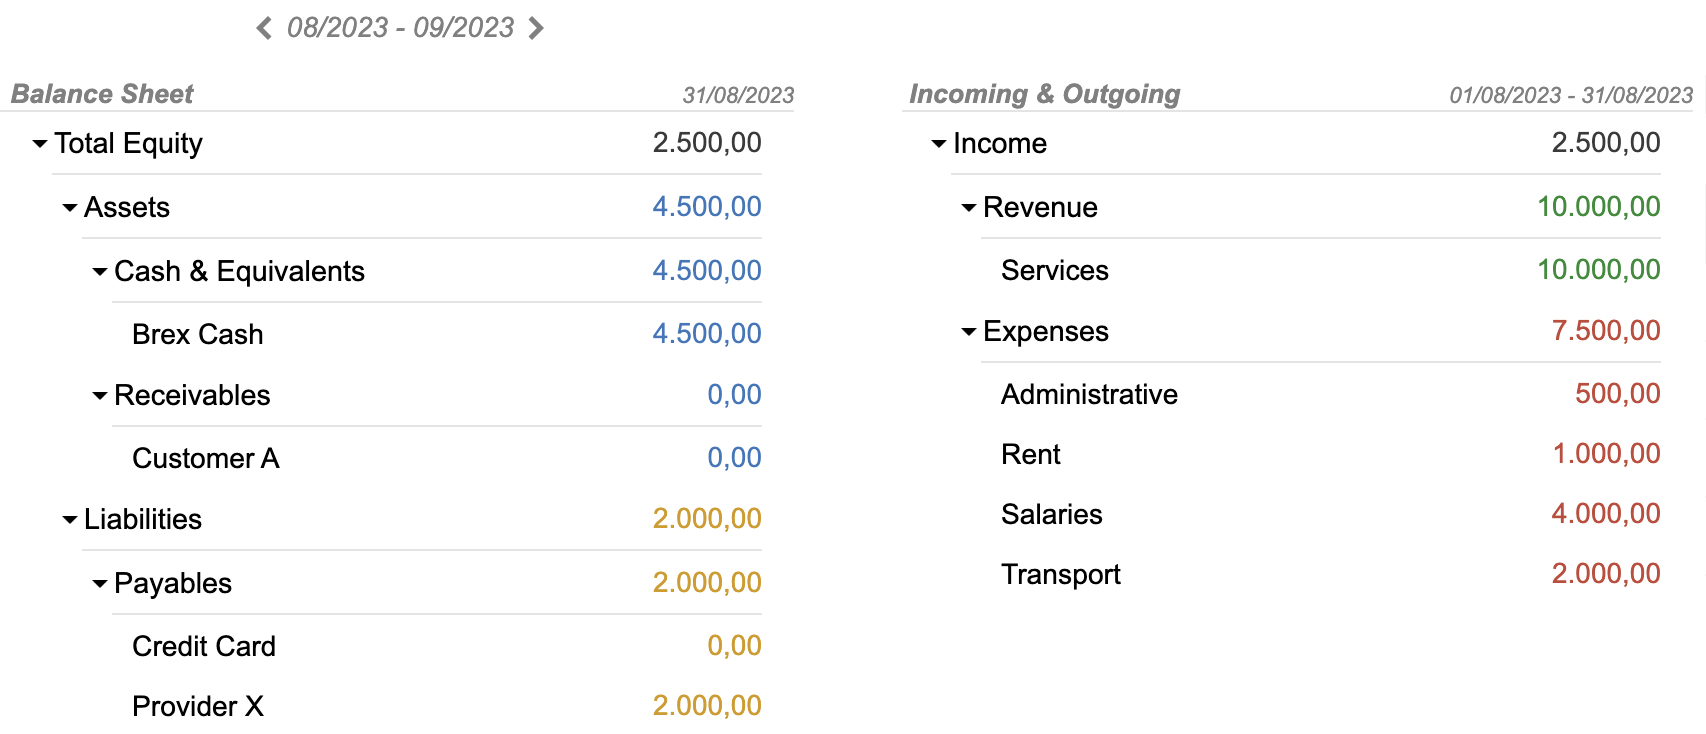
Add detail — As your operations expand, questions arise. How much are we spending? Who owes us money? Who do we need to pay quickly? To answer these questions efficiently, enhance your Chart of Accounts with more specific categories:
- Expense Categories — Add general categories under Expenses to gain more control over spending
- Balance Sheet — Include receivables under Assets and payables under Liabilities for deeper insights into financial performance and position
Meet external requirements — As your business grows, so do external requirements like provisioning, taxes, reporting, and compliance. Your Chart of Accounts adapts to reflect these obligations. Beyond external demands, a robust Chart of Accounts empowers you to analyze your business deeply — implementing cost accounting for multiple product lines, enabling data-driven decisions with precision.
Your Chart of Accounts is not static; it’s a flexible tool that evolves with your activities.
Building hierarchies
Adding accounts to a Group
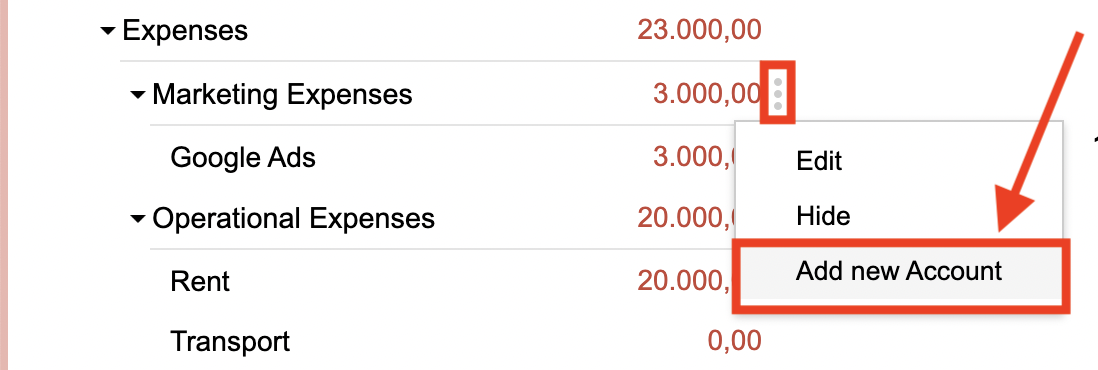
Navigate to your Book and select the Group in the left menu by clicking the sandwich button to its right. Click Add New Account on the popup, enter the account name, and click Save. Repeat for each account you want to add.
Adding a parent Group
Click on the Group you want to nest, then click Edit on the popup. In the group’s settings, select the Parent from the dropdown list and save. The group hierarchy updates automatically.
Hierarchy rules
When building hierarchies, keep these conditions in mind:
- Unique group placement — A group can be part of only one hierarchy. Once placed within a hierarchy, it cannot simultaneously belong to another
- Non-grouping parent — A parent group cannot contain accounts directly. It serves as a higher-level category for subgroups, ensuring that balance totals always sum correctly
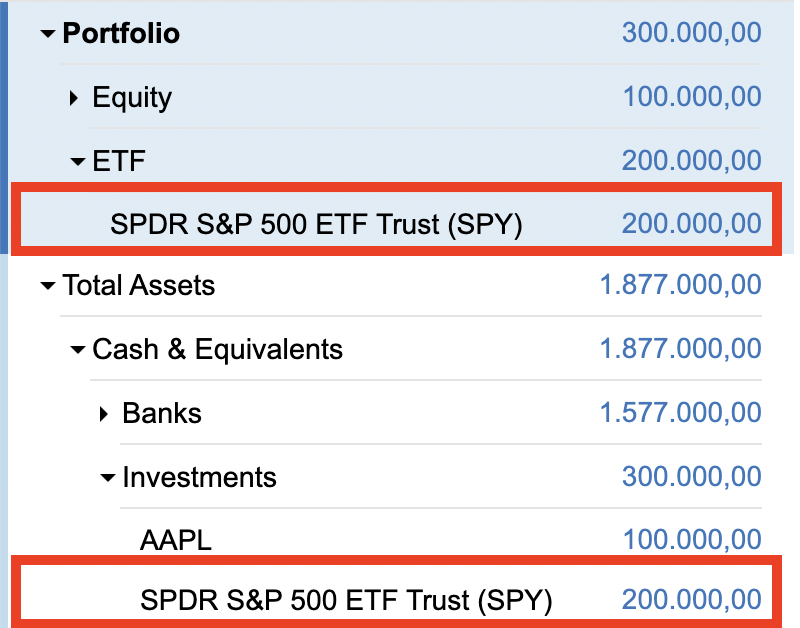
- Single account use per hierarchy — Each account can only appear once within a hierarchical structure. An asset can only be counted once on the Balance Sheet, but you can use that same asset in a separate hierarchy — for example, to track your portfolio
- Balance Sheet grouping — Groups under the Balance Sheet can only hold Asset and Liability type accounts
- Income Statement grouping — Groups under the Income Statement can only include Incoming and Outgoing type accounts